HomeNavigation arrowBlogNavigation arrow
Current page
Feature Updates

Weekly Recap: Titled Luxe Prints, Zoom Cropping, and Candy Image Studio “From Scratch”

Weekly Recap: Titled Luxe Prints, Zoom Cropping, and Candy Image Studio “From Scratch”
Hey photo friends! 👋

This week’s updates are a fun mix of new products, new visual workflows, and small-but-important fixes that make day-to-day work smoother—especially across Candy Image Studio, retail packages, and PhotoRoster/PhotoTag downloads.

Let’s jump in. ✨

📣 Dashboard: Client Outreach + Workflow Quality-of-Life

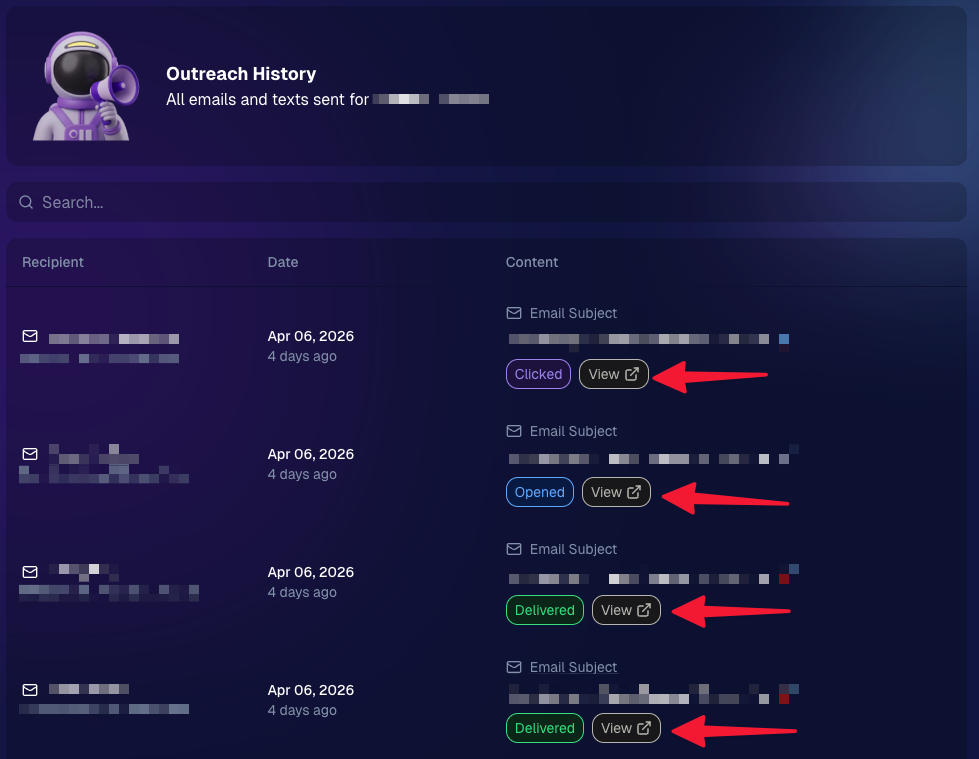
Client Outreach email history is easier to use and more reliable:

  • Added a “View” button in Client Outreach email history so you can open the sent email in a new tab (similar to how order receipts work).
  • Fixed an issue where email status didn’t always show for all emails in the status list.
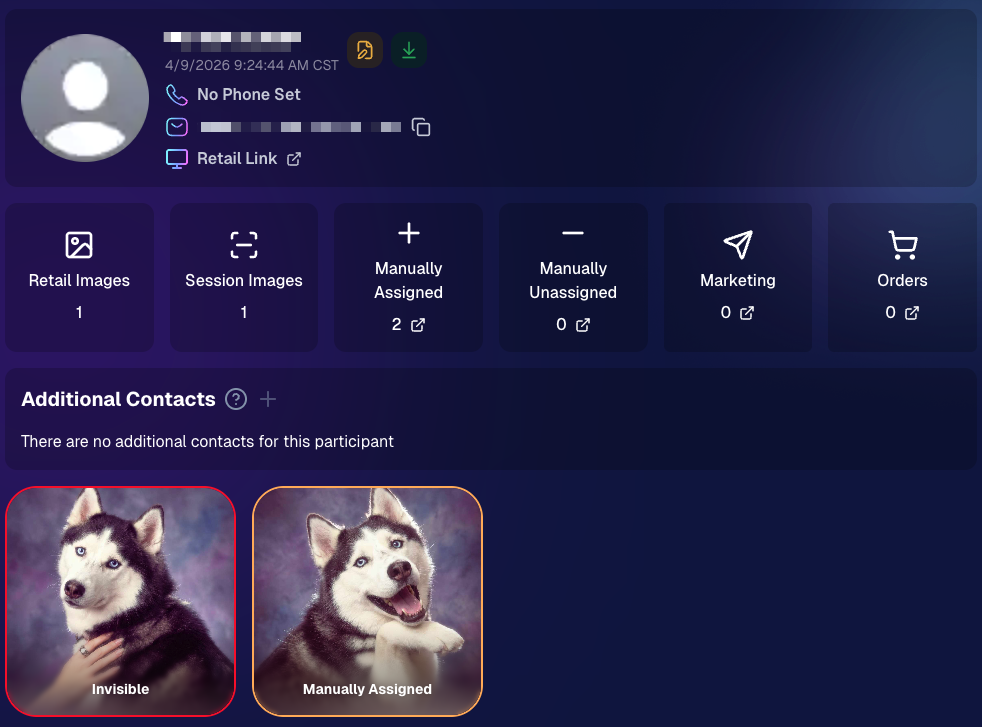
More clarity when reviewing participant galleries:

  • The Participant Details page now shows invisible images, clearly marked in red with an “Invisible” label—so you can understand what’s hidden without guessing.
PhotoTag participant gallery downloads got safer:

  • Fixed PhotoTag participant gallery downloads overwriting images when multiple files shared the same frame.
  • Fixed the download count displayed on the download button being off.

🎨 Candy Image Studio: Create Without an Input + A New Node

Candy Image Studio has two notable upgrades this week:

🧠 No input image required (generate from scratch!)
Candy Image Studio no longer requires an input image to get started. You can generate from scratch using the “From Scratch” node (at the very bottom), or by starting from custom text or a custom image—great for things like creating portrait backgrounds or creative assets.

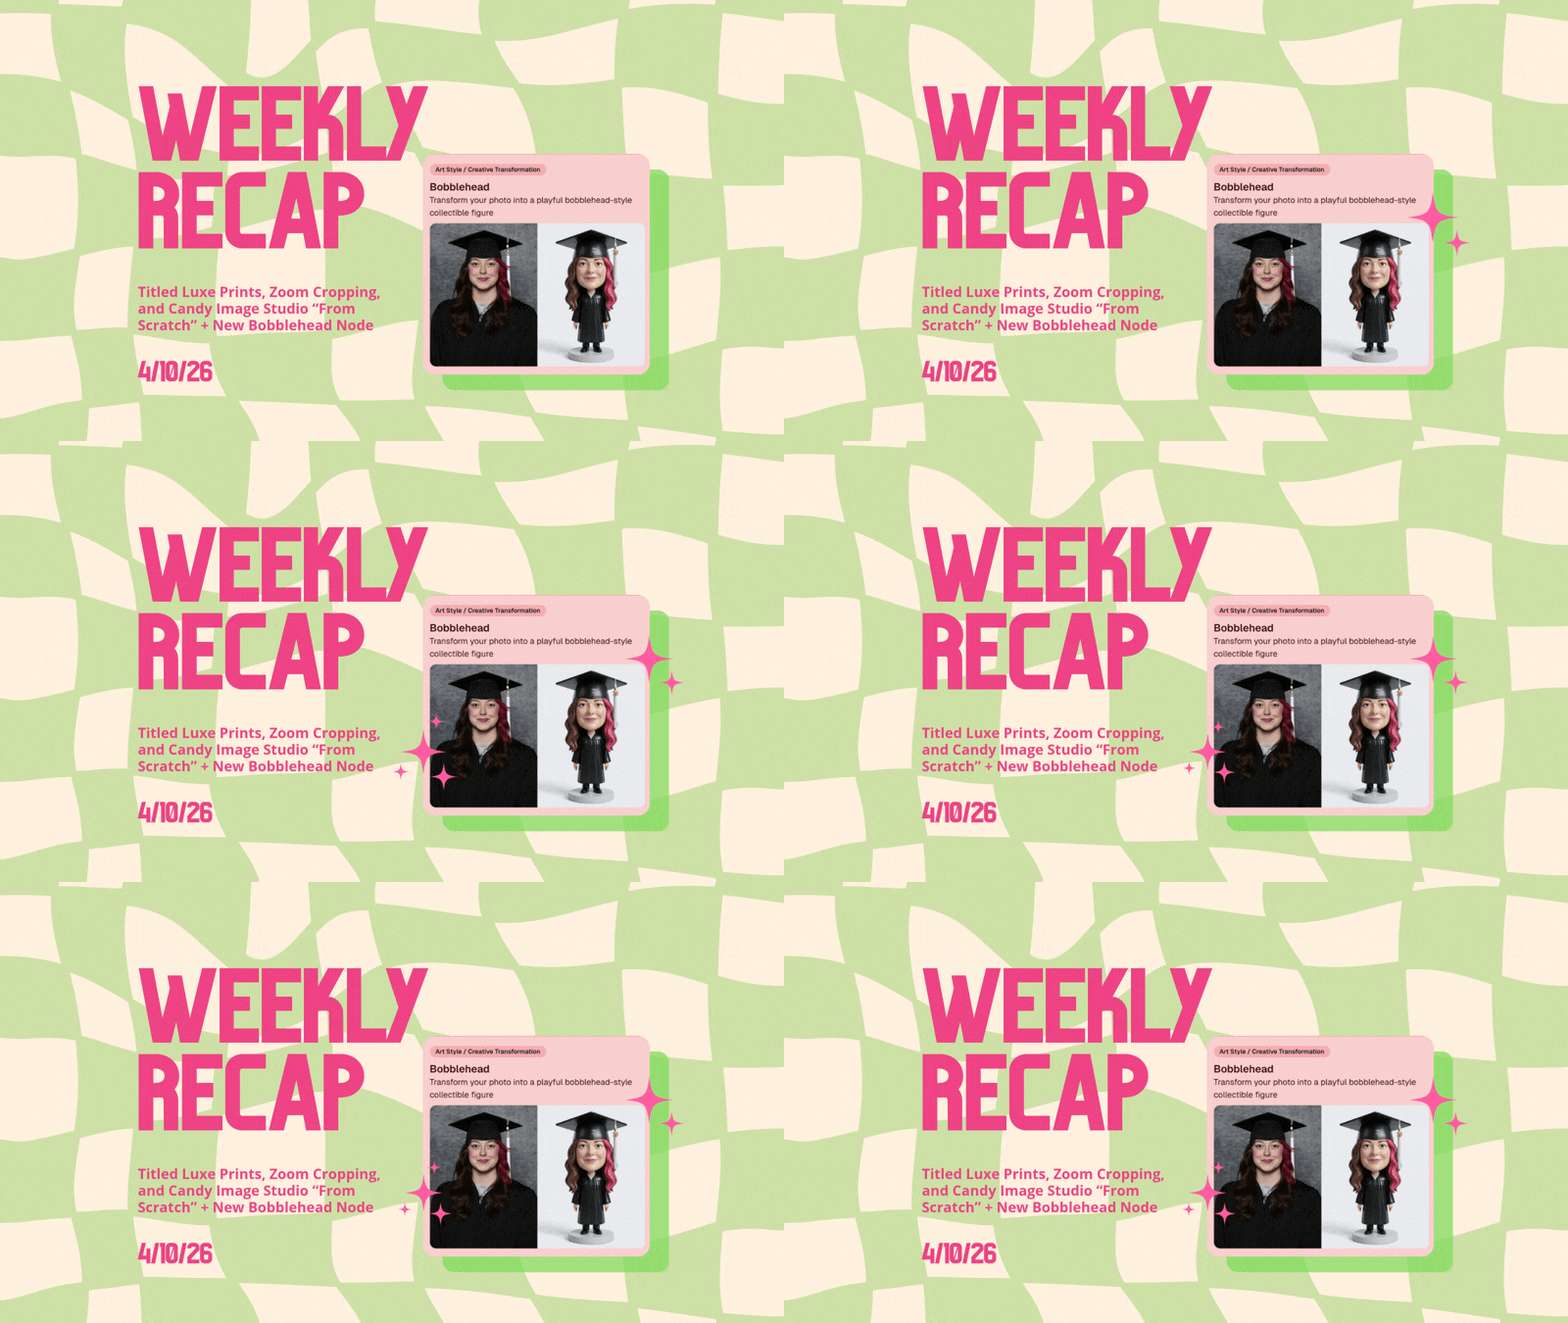
🆕 New “Bobblehead” node
A brand-new Bobblehead node is now available inside Candy Image Studio.

Disclaimer: This is not a new product. This is an image node in the Candy Image Studio.

🏈 Jersey Jotter + Event Settings Cleanup

Jersey Jotter settings were removed from the Create/Edit Event popup.
Since Jersey Jotter now has its own dedicated page, we pulled those settings out of the event popups to keep Create Event as minimal (and fast) as possible—and keep Edit Event aligned with Create.

New: “Auto Enhance” can be turned off in Create/Edit Event.
Important clarity here:

  • Auto Enhance isn’t new — it has always been enabled by default.
  • What’s new is the ability to turn it off from the Create/Edit Event popup.
  • It’s labeled “Auto Enhance” (not “Retail Enhancement”) because it affects more than retail, including things like LiveLoop, Dashboard previews, Shareable Download Gallery, and more.
  • Note: this setting only impacts images uploaded after you change it. (So anything already uploaded keeps whatever enhancement state it had at upload time.)

🛍️ Retail: Package Backgrounds + Fixes

A few retail improvements landed to reduce confusing edge cases:

  • When selecting a PNG (without a faux background render) during the “Next Package Item Image Picker” step, the chosen background will now default to the first background in the background picker list (instead of the purple default).
  • Fixed an issue where the background selector step didn’t always appear for non-faux BGR images.
  • Fixed a crash related to having Wall Clings in packages.
  • Updated the Free Download description to: “Free simple, full-resolution download of your image.” (Previously it implied lower resolution.)

🔍 NEW: Zoom Cropping “Z-Cropping” (Dashboard + Retail)

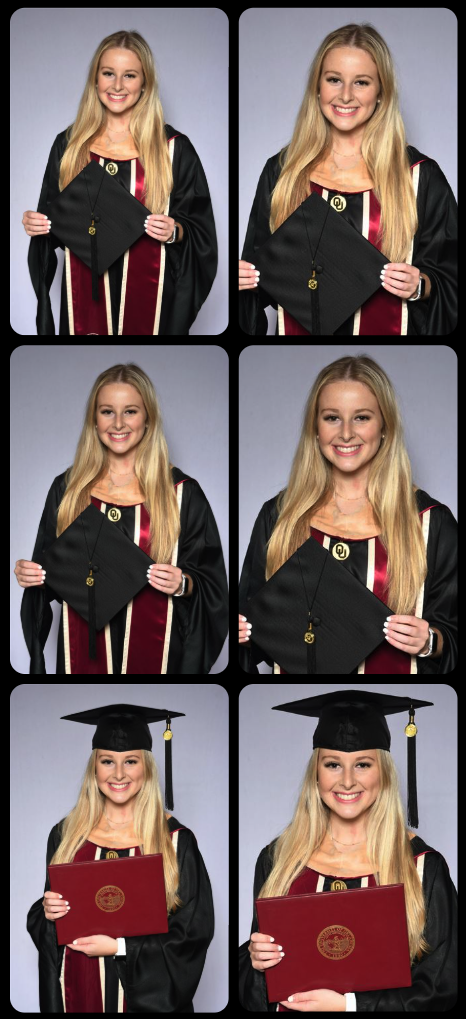
In Advanced Offer Settings, you can now enable Zoom Cropping, which automatically adds an additional image into the customer’s gallery that is zoom-cropped toward their face.

Details & rules:

  • ✅ Works on Face Matching Events
  • ✅ Works only on images with one face
  • ✅ All default graduation offers/price levels now have Zoom Cropping enabled
  • Behind the scenes, it applies a ~30% zoom toward the face, with an additional ~30% pull from the center of the image toward the face (clamped to avoid cropping beyond image bounds)

This is a great “quiet upgrade” for grads and portrait-style moments where customers love a tighter crop—without you needing to manually create it.
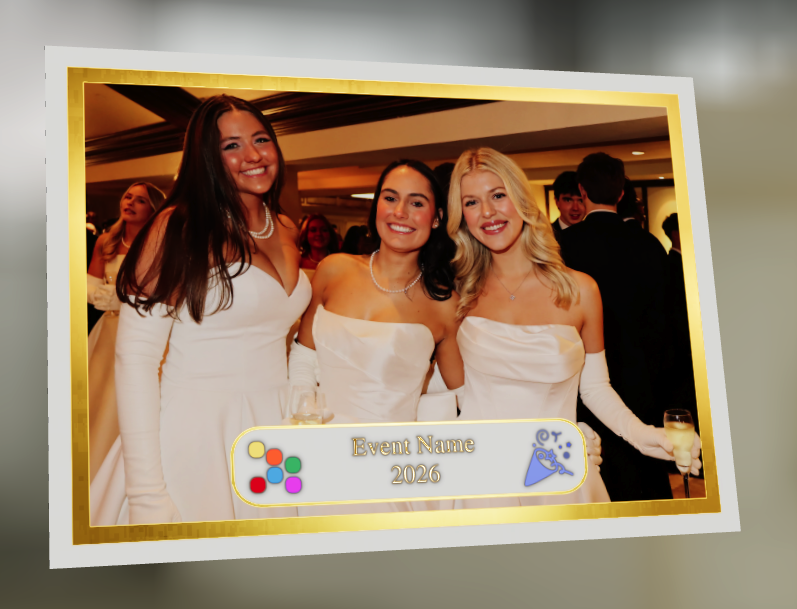
🖼️ New Products: Titled Luxe Prints (Dashboard + Retail)

Two new products just landed:

  • 5×7 Titled Luxe Print
  • 8×10 Titled Luxe Print

Want to see the 3D preview?
https://app.nowcandid.com/3d/titled-luxe-print

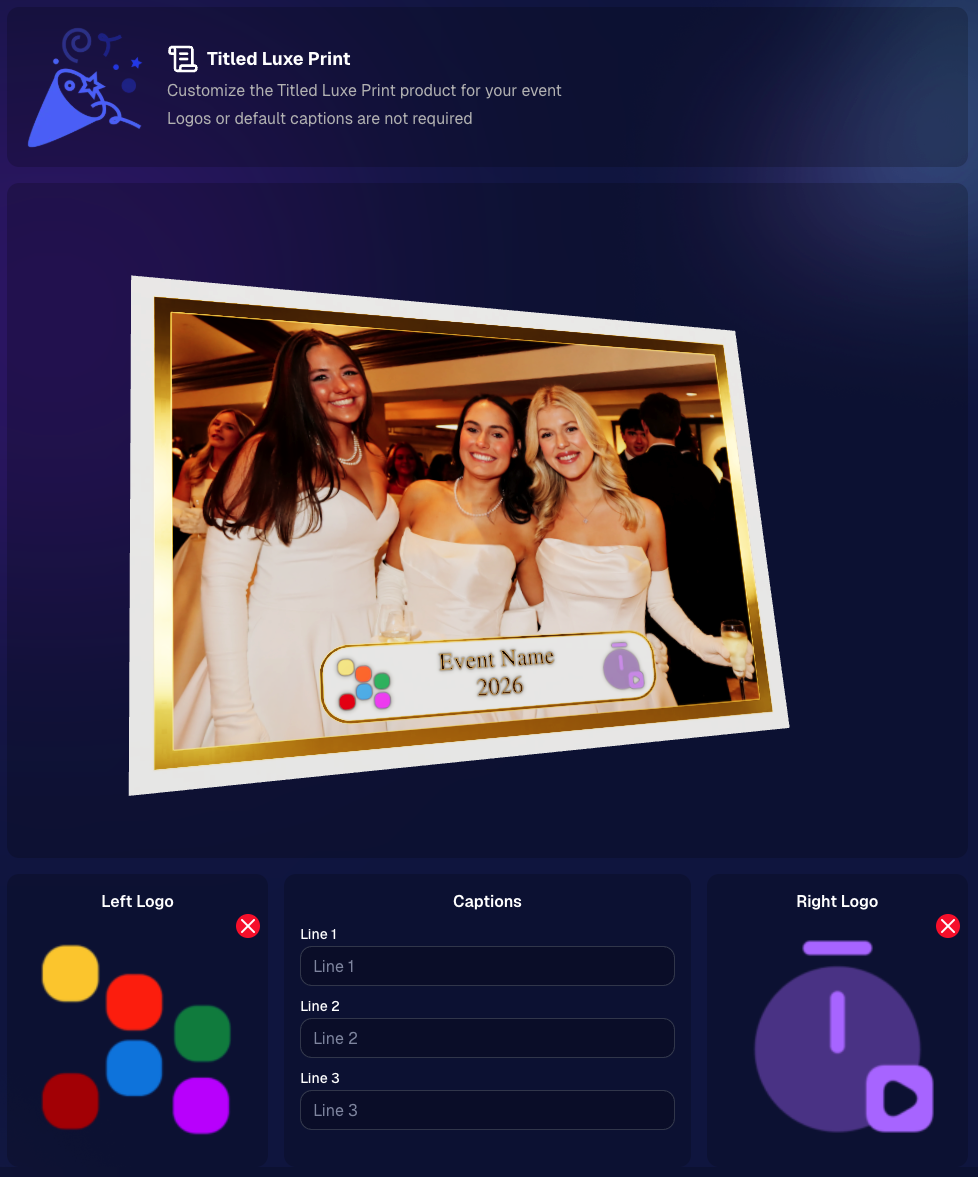
New: “Edit Titled Luxe Print” Page (per event)
There’s a new event-level page available in the Dashboard sidebar only if one of the new titled products is included in the event’s offer. From there, you can:

  • Set default captions
  • Select left/right logos
  • Preview the 3D render
  • (Easter egg: rotate the render and you can spot your business name on the backprinting.)
Notes:

  • Default captions and logos are optional
  • Retail shoppers can change captions when ordering
  • Logo requirements: upload/import a 650×650 transparent PNG
  • Retail supports both 2D + 3D renders, including your custom logos
  • Order Details pages now display the selected logos, similar to how we show captions and colors

That’s the week! 💫

Between Zoom Cropping, Titled Luxe Prints, and Candy Image Studio’s new From Scratch flow (plus a pile of cleanup across retail + downloads), this update adds a lot of power without adding extra complexity.

Keep creating magic,
— Candy 🍬

Related articles

Weekly Recap: Overlay Artwork in the Product Gallery 🎨✨
Feature Updates
January 3, 2025

Weekly Recap: Overlay Artwork in the Product Gallery 🎨✨

2
 minutes read
Hello again, my wonderful photographers!

Candy here, and welcome to another Weekly Recap. This time, we’ve got one exciting improvement to share—overlay artwork now appears by default on product previews in the product gallery!

Let’s take a closer look. 🌟

Overlays Rendered by Default in Product Gallery 🎉

We’ve introduced a fun change for anyone using Banner Overlays or Full Frame Overlays in their NowCandid Events:

  • Visible Overlay Art

    Items in the retail site’s product gallery will now display your Event’s overlay artwork right away. Customers can see exactly how their images look on each product, with that extra creative touch of your Event's Overlay Art.

Theme: Marshmallow - Watermarking: Heavy

Theme: Liquourice - Watermarking: None

  • Use Overlay by Default

    When customers go to customize or add a product to their cart, the “Use Overlay” option will already be selected. This makes it simpler to highlight your unique event designs or branding. But they can still view & order the product without the overlay art.
  • Easy Toggle in Settings

    If you prefer to keep products overlay-free by default, no worries! Head to the “Retail Site Settings” in your Profile and uncheck “Use Artwork By Default.” That way, product images will display without your Event overlay art unless customers choose otherwise.

Find this option in your Profile settings

Enabling Use Artwork By Default will feature your Event's Overlay Art on the renders in the product gallery page. Guests can choose to view and order products without the art, but "with overlay art" will be the default selection.

That’s all for this week’s short-and-sweet recap!

We hope this feature adds a little extra flair to your retail experience.

As always, let us know what you think or if you have any feedback.

Candy 🍬

Big News: Introducing Photo Booth Mode in iOS Capture & Upload App 4.13! 🎉
Feature Updates
December 30, 2024

Big News: Introducing Photo Booth Mode in iOS Capture & Upload App 4.13! 🎉

6
 minutes read
Hello, my wonderful photographers!

Candy here with exciting news for you on this festive Monday. We’re launching Capture & Upload App Version 4.13, and it comes with a massive new feature: Photo Booth Mode.

Let’s dive into what it is, how it works, and why we think you’ll love adding it to your events!

What Is Photo Booth Mode? 🤳

Photo Booth Mode is a brand-new option inside the Capture & Upload App (Version 4.13 on iPad). When you log in to your Event, you’ll see a shiny new “Photo Booth” button alongside the usual options.

Tap that button, and your iPad transforms into a fun, self-serve photo booth station, perfect for:

  • Weddings & Parties: Encourage guests to capture memorable group shots and instantly send them to their phones.
  • Sports & Corporate Events: Provide interactive experiences that keep people engaged and excited.
  • Holiday Gatherings: Add some festivity and help guests create themed keepsakes right on the spot.

Whether you tether a Nikon, Sony, or Canon camera or just use the iPad’s built-in camera, Photo Booth Mode gives you a convenient, autonomous way to let guests take pictures without any manual work from you (aside from set up and takedown of course).

How It Works ⚙️

  1. Tap to Begin Screen
    • Guests see a dimmed live view with “Tap to Begin.” Once tapped, the booth takes three pictures in quick succession, each with its own 3-second countdown.
  2. Real-Time Overlays
    • If your event has Bottom Banner Overlays or Full Frame Overlays, they appear in the live view. This lets guests see exactly where the art will sit, so no one’s face gets covered.
  3. On-Device Styling
    • Background Removal & Custom Backgrounds: If you’ve uploaded backgrounds for your event, they’ll be available for selection.
    • Filters: Guests can apply classic filters like Noir, Sepia, or Clarendon before sending off their images.
    • Reshoot: Not happy with a pose? Subjects can tap “Reshoot” and start over, easy-peasy.
  4. Instant Delivery
    • Both QuicPics or PartyPics Workflows deliver images in real time:
    • If it’s QuicPics, your subjects will get the image files directly via MMS, with Overlay Art applied, if your Event has any. They'll also receive a link to their personal gallery. Reminder, with QuicPics we charge a small fee per uploaded image.
    • It it's PartyPics or any of our other Programs, your subjects will only receive a link to their personal gallery. And there is no additional charge or fee.
    • When visiting their personal gallery, they can buy prints & downloads of these images with various product & customization options.
  5. Positive ID vs. Face Matching
    • Face Matching: Prompts appear to tap faces, then gather contact info for those individuals.
    • Positive ID: Participants just enter their info before sending images, no face-tapping required.

All images are uploaded to your NowCandid Event like normal, so no matter your usual Workflow, things will still function seamlessly!

Key Requirements & Limitations ⚠️

  • Camera Orientation
    • Nikon cameras support both horizontal and vertical orientation.
    • Sony and Canon are currently limited to horizontal orientation.
  • iPad-Only Launch
    • Photo Booth Mode works on iPad (and only in vertical orientation), not on iPhone or Windows at this time.
  • No Built-In Strip Printing
    • If you need to provide prints, set up a separate print station and use quic.pics/portal to download images with or without Event Overlay Art and print them on-the-spot!
  • Strong Internet Connection
    • Ensure your iPad has solid Wi-Fi or LTE, as the app needs to log into the event, download overlays/backgrounds, and upload images in real time.

Why You’ll Love Photo Booth Mode ❤️

  1. Interactive Fun

    Guests choose their own backgrounds, overlays, and filters, creating a memorable activity at any gathering.
  2. Seamless Feature Integration

    Images will show up in LiveLoop slideshows, appear alongside subject's other images in Personal Galleries, be managed using NowCandid's typical image and participant management tools, and more!
  3. Seamless Workflow Integration

    The images flow right into your existing event Workflows—Tap-A-Face, Selfie Check-In, Type & Take, and more—without any additional setup.
  4. Effortless Setup

    Whether you opt for a tethered DSLR or the iPad camera, it’s a simple tap away in Capture & Upload App 4.13.

Download Capture & Upload App 4.13 Today! 📱

With Version 4.13 now live for iPad (iOS only at the moment), you can start offering Photo Booth Mode at your next event.

We’ve tested it extensively, but with so many different devices and use cases out there, we encourage you to try it out ASAP.

If you spot any quirks, let us know, and we’ll work on improvements swiftly.

Thank you for joining us in this Big News blog post.

We can’t wait to hear your success stories with Photo Booth Mode!

Candy 🍬

Weekly Recap: Group Photos for Grads & Retail Download Tweaks📸🎉
Feature Updates
December 27, 2024

Weekly Recap: Group Photos for Grads & Retail Download Tweaks📸🎉

7
 minutes read
Hello, my wonderful photographers!

Candy here, and welcome to another Weekly Recap. We’ve got a couple of handy feature updates, plus some exciting news about our upcoming Capture & Upload App release for iOS.

Let’s dive in! 🌟

1. Group Photo Option in GradPics 📸

We’ve introduced a Group Photo toggle in the Manage Images tab for GradPics Events. When you mark an image as a Group Photo, here’s what happens:

  • Appears in Every Gallery: Regardless of face matching, every participant sees the group image in their personal gallery.
  • Exclusive Products: If your Event’s Offer includes any Group Photo products (like Group Photo Download or Group Photo Print), they’ll only be purchasable on those items.
  • No Group Photo Products? Then the group image behaves like a normal image, available on all your usual products.
  • Not in Personal Gallery Download: To avoid easy sharing of a big group image, we’re excluding Group Photos from any personal gallery download product for now.

We’ve added a quick popup explanation when flagging an image as a Group Photo in the Web Dashboard, just in case someone clicks the Group Photo toggle by mistake. 🎉

2. Personal Gallery Download Hiding Rule 🤫

To help clients avoid confusion and refunds, we’re adding a new rule:

  • Hide Personal Gallery Download: If the Offer sells individual image downloads and a participant only has one image, we hide the personal gallery download.
  • Still Visible for One-Image Events: If your Offer doesn’t have individual downloads, the personal gallery download stays visible, even if the participant just has one photo.

This little tweak prevents clients from accidentally buying a personal gallery download when they only need a single download. 🛒

3. Heads-Up: Capture & Upload App 4.13 for iOS Only! 📱

On Monday, December 30th, we’ll release Version 4.13 of the Capture & Upload App for iPhone & iPad. (Windows stays at 4.12 for now.) We’ve added some major updates:

Please update one of your devices, test it out, and let us know if you catch any bugs. With so many devices, camera brands, and workflows out there, early feedback helps us fix issues quickly.

4.13 Highlights

  1. Photo Booth Mode
  2. Overlays on Capture App Image Review
    • Overlays now render directly over the captured images on the app (if the aspect ratio is supported).
    • 3:2 aspect ratio photos are needed for full frame overlays, but any aspect ratio works for banner overlays.
    • This lets you and your subjects see the art in real time, ensuring no important parts are covered!
  3. Out-of-Space Error Popup
    • If your device is running low on space when a new image is taken, you’ll get an immediate error popup.
    • Remember to regularly clear out old images via the app’s “Delete App Data” button in the info (i) menu to keep everything running smoothly.

Minor Updates

  • Session data is now wiped when switching NowCandid accounts in the app, so "Restore Session" won't take you to an Event from a different account!
  • Event Shooting Buttons on Tablets now match iPhone UI (centered vertical menu).
  • Camera Trouble Popup includes a note about app permissions. (Always make sure to agree to all app permissions needed when the app is starting for the first time!)
  • Auto Remove Spaces from the account email on login. (some folks accidentally put a space and didn't know why they couldn't log in!)
  • Candy Splash Screen when the app is booting up now supports dark mode.

Thanks for tuning into this shorter Weekly Recap. We hope these improvements help you finish the year strong! If you have any questions or feedback, don’t hesitate to reach out.

Candy 🍬

Let’s get in touch

If you’re a photographer looking to add NowCandid services to your wheelhouse – set up a call by clicking the button below.

How to customize formatting for each rich text

How to customize formatting for each rich text

How to customize formatting for each rich text

How to customize formatting for each rich text

How to customize formatting for each rich text

What’s a Rich Text element?

The rich text element allows you to create and format headings, paragraphs, blockquotes, images, and video all in one place instead of having to add and format them individually. Just double-click and easily create content.

A rich text element can be used with static or dynamic content. For static content, just drop it into any page and begin editing. For dynamic content, add a rich text field to any collection and then connect a rich text element to that field in the settings panel. Voila!

Headings, paragraphs, blockquotes, figures, images, and figure captions can all be styled after a class is added to the rich text element using the "When inside of" nested selector system.

  • List One
  • List Two
  • List Three
  • List Four
  • List Five

This is a link

This is bold text