HomeNavigation arrowBlogNavigation arrow
Current page
Feature Updates

Weekly Recap: More Virtual Group Control, New Sports Backgrounds & Better BGR Tools 🏈✨

Weekly Recap: More Virtual Group Control, New Sports Backgrounds & Better BGR Tools 🏈✨
Hey photo friends! 👋

Candy here with another weekly recap! This week brings more control to Virtual Group Builder, a much better home for Event Background Removal, new Candy Image Studio exposure tools, and—yes—27 new sports background sets. 😎

Let’s jump in!

🧑‍🤝‍🧑 Virtual Group Builder Additions

Ask and you shall receive... sometimes! We’ve gotten some good feedback on Virtual Group Builder, and this week several new controls are here to make layouts easier to fine-tune:

↕️ Force subjects onto different rows

  • While dragging a subject, new Add to Row buttons appear over the other rows. Drop the subject there to explicitly move them where you want instead of relying entirely on automatic placement.
  • Previously you were limited to automatically determined rows, you still have those but can now override them!

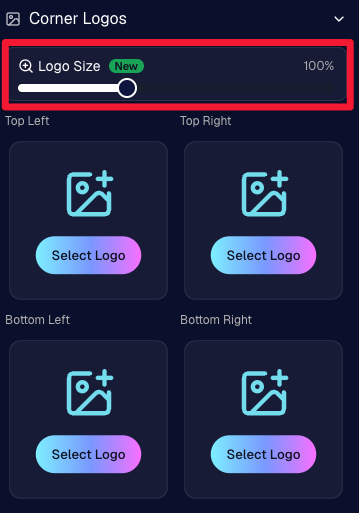
🔍 New logo size slider

  • Adjust your corner logos to be smaller or larger than the default.
  • Previously they could be considered a bit tiny, but this gives you a bit more control!

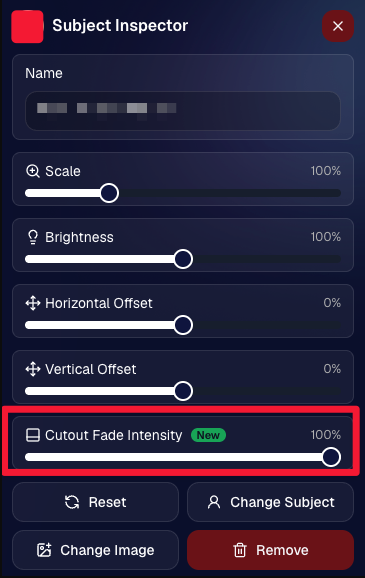
🌫️ Individual cutout fade control

  • The Subject Inspector now has its own cutout fade intensity slider, separate from the global setting, so you can fine-tune individual subjects when needed.
  • This will let you tweak the cutout fade intensity for subjects in the front row or on the sides of the virtual group, in case you're wanting a very specific look.

👥 Smarter merged-participant image selection

  • The Subject Image Picker will only show images from merged participants when they share the same name.
  • This typically does not matter, but in the case of a parent doing a Selfie Check-In of themselves and then of their child later, this will keep Virtual Groups working as expected!

Just a few additions, but very useful ones when you’re trying to get a Virtual Group looking just right!
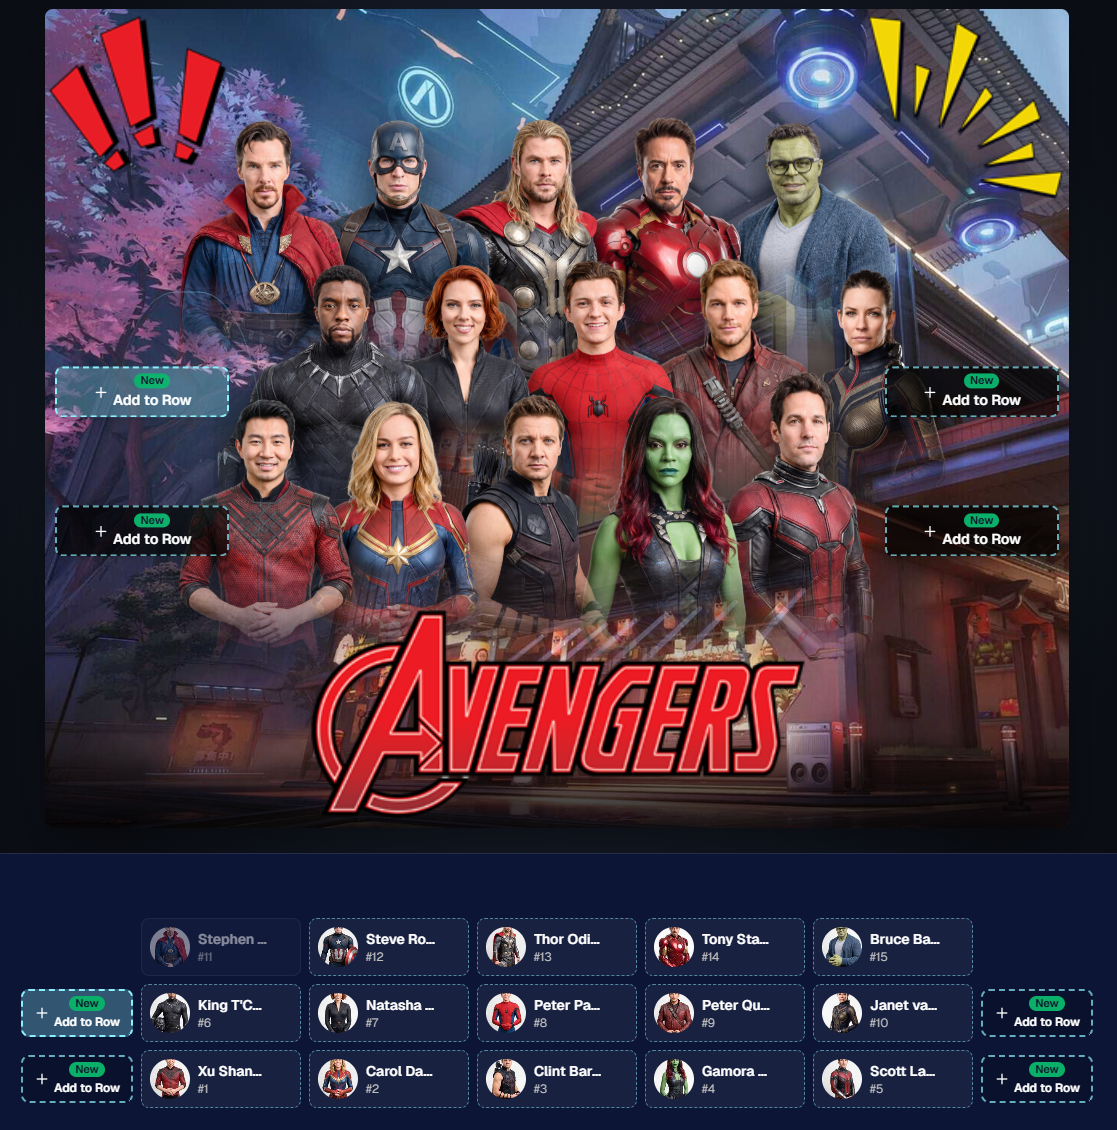
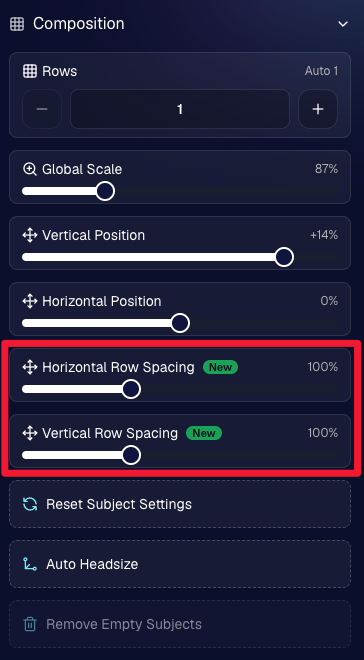
Drag and drop subjects into other rows for more control than ever!

New options to more quickly space out your subjects!

When viewing subject details, adjust them by individual!

Control the size of your logos!

🏈 27 New Sports Background Sets

Alright, shoutout to the random guy who told me (me being Candy, in case you forgot!) that he didn’t like the backgrounds. We heard you! 😂

This week we’ve added 27 new sets of sports backgrounds, including a brand-new Sports – Locker Room background category.

And, in case you missed it, last week we also added an AI Background Generator so you can create entirely new, modern backgrounds of your own.

A quick reminder... you already have a lot of control over which backgrounds your customers actually see:

🎨 Edit the default backgrounds in your Offers

📤 Upload your own custom backgrounds at both the Offer-level and Event-level

🤖 Generate new backgrounds of your own with AI

🏈 Choose from our (now growing) collection of built-in choices

We have a TON of default backgrounds—and yes, many have been around for a while—but you’re never locked into using them. You can build your own look for your business, and we’ll keep adding new options over time too.

✂️ New Dedicated Background Removal Page

Event Background Removal now has its own dedicated Dashboard page, accessible from the Event Sidebar. It is not longer just a popup!

The BGR toggle on Event Overview will take you there too, giving all of these controls a little more breathing room.

On the new page, you can:

✅ Enable or disable Background Removal

🖼️ Manage your Event Backgrounds

🎨 See your Offer Backgrounds with a direct link to the Offer

📊 See how many cutouts have finished and how many are still processing

⏳ Watch a live progress bar while Background Removal is working

📂 See all valid Event folders and which ones are marked for Background Removal

And if your Event is a new Event: ✂️ You can mark an existing folder for Background Removal even if it already contains images!!!

🎨 Candy Image Studio: Better Exposure Fixes

🌙 New Fix Underexposure node

  • Helps recover images that came out too dark.

☀️ Fix Overexposure greatly improved

  • The existing overexposure tool has been reworked for more reliable results.
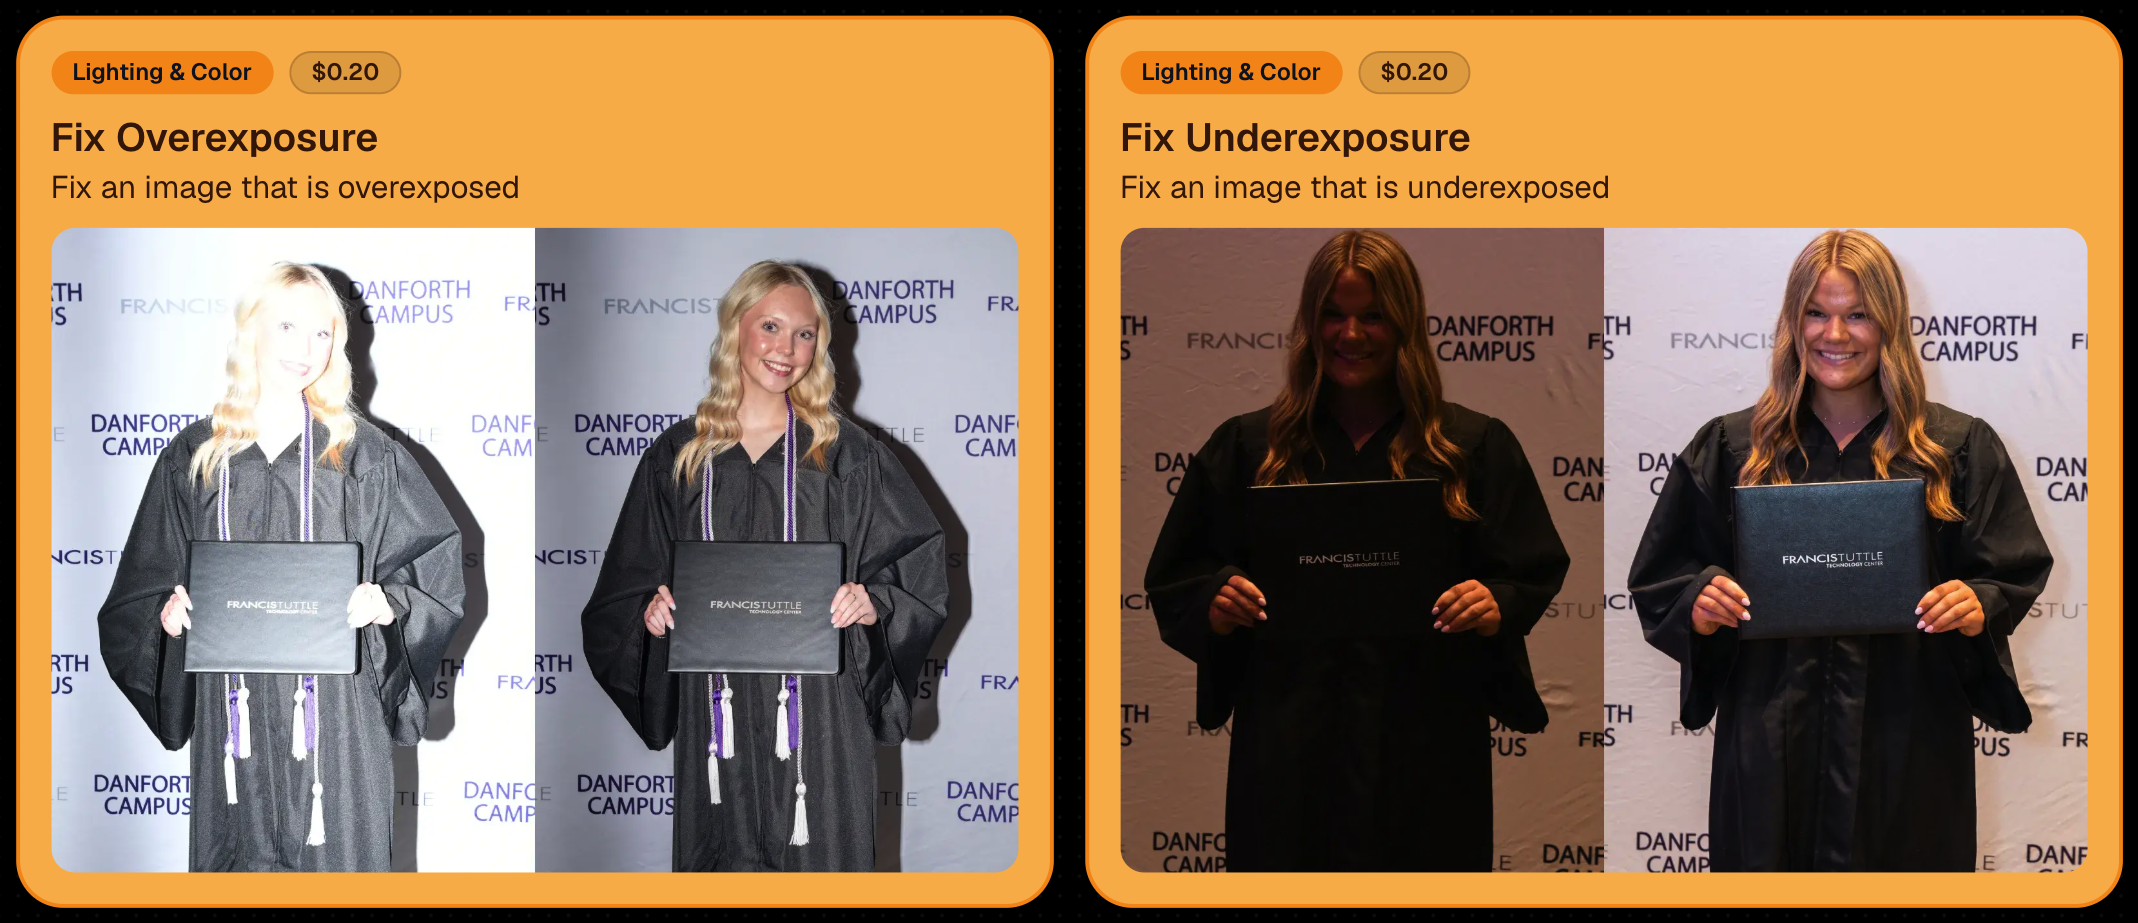
Utilize Candy Image Studio to fix images so they can sell, quickly and affordably!

🏈 Jersey Jotter Progress Tracking

New Jersey Jotter progress bar

  • When Jersey Jotter is active and still has unprocessed images, its dedicated page now shows processing progress—similar to Candy Culler and the new Background Removal page.

This makes it much easier to tell whether recognition is still working through a large Event.

🛍️ Retail Improvements

Titled Luxe Prints now work with package prefill

  • Packages can now automatically prefill eligible Titled Luxe Print products just like other supported products.

🖼️ Titled Luxe Print package rendering fixed

  • Fixed an issue where these products could render incorrectly inside packages.

🤖 AI-generated backgrounds now render correctly on products

🎨 Selected backgrounds now stay visible through the final product step

  • Fixed an issue where the chosen background could sometimes disappear on renders when reaching quantity and finish steps.

📝 Several product descriptions updated

  • Some product descriptions have been refreshed for better clarity.

🖼️ AI Edit + BGR Assignment Fix

👥 BGR versions of AI edits now keep direct participant assignments

  • If the original non-AI image was directly assigned to someone, its Background Removed AI-edited version will now correctly inherit that relationship.

📦 Order Details Fix

📝 Package captions now display correctly

  • Fixed cases where Order Details did not show caption information for certain products contained inside packages.

📱 Capture App 5.9.1 – iOS OTA

📸 Photo Booth fix for iPad

  • Fixed the Photo Booth gallery strip being cut off on certain iPad models.

That’s the week!

More Virtual Group control, a much stronger Background Removal workflow, some useful exposure tools, and plenty of fresh sports backgrounds to work with.

And if you still don’t like the backgrounds... now you’ve got plenty of ways to show us how it’s done. 😉

Keep creating magic,

Candy 🍬

Related articles

Helpful Tips: Using QuicPics at your Proms
QuicPics
April 19, 2023

Helpful Tips: Using QuicPics at your Proms

6
 minutes read

QuicPics is an innovative photo booth alternative designed to enhance the photo-taking experience at events like proms. As a photographer, QuicPics allows you to offer a modern, fun, and interactive experience for prom attendees, while you get paid upfront for your services. It can be sold as a “mobile photo booth” service, as a manned portrait station akin to traditional photo booths, or as a service where you provide both! Thanks to our cloud, no matter how many photographers or photo stations you have, they’ll all talk to each other, meaning guests only have to provide their contact info once. 

This short guide will walk you through how to effectively use QuicPics for a prom night:

  1. First, Understanding QuicPics:
    QuicPics is quite different from NowCandid’s other programs, it texts image files directly to guests in addition to a link to their online gallery. With NowCandid’s other programs, only links to online galleries of images are delivered. QuicPics also charges the photographer for each image they take and upload to the cloud, making it the only NowCandid feature that charges the photographer in any way.
  2. QuicPics’ Advantage:
    QuicPics is a perfect alternative to traditional photo booths. It's a mobile, modern, interactive, and engaging way to capture memories at proms. With instant texting of images to attendees, QuicPics ensures a seamless experience for everyone involved.
  3. Create a Unique Photo Station:
    Make your photo station stand out by offering themed backdrops, fun props, and creative lighting. This will not only draw the prom-goers to your station but also encourage them to share their professional photos on social media, giving you free advertising and potentially attracting new clients.
  4. Pricing and Payment:
    As a photographer, it's essential to get paid upfront for your services. We recommend charging between $200 to $300 per photographer hour, possibly offering a discount if they are requesting a large number of photographers and/or hours. Alternatively, talk to the school or with involved parents about increasing the cost of prom tickets to pay for QuicPics services for the prom. Take payments using PayPal, Square, Venmo, via check, checkout on your own website, or whatever means are most convenient for you! Just ensure it looks professional to the school you’re dealing with.
  5. Planning your Workflow:
    To ensure a smooth process, have a tablet available for prom attendees to interact with the QuicPics platform. This will allow them to receive their photos via text message instantly thanks to the LTE connection of the tablets. We recommend using the Tap-A-Face workflow, which simplifies the process of collecting data and pairing it to their face, as well as being a fun addition to the prom already!
  6. Selling the Service:
    To promote your QuicPics services, create a compelling sales pitch that highlights the benefits of a mobile photo booth experience, the convenience of instant photo sharing, and the interactive nature of the platform. Showcase sample photos and emphasize the unique value QuicPics brings to a prom night.

QuicPics is a fun, interactive, and modern solution to traditional photo booths, making it an excellent addition to any prom night. By following these tips, hopefully you'll be able to provide a memorable experience for prom attendees while securing payment for your services. Happy snapping!

Proms: An Untapped Gold Mine
PartyPics
April 14, 2023

Proms: An Untapped Gold Mine

4
 minutes read

Plenty of photographers think photographing a prom is not worth their time and energy. They're not wrong to think that either... as that can often be the case! But, NowCandid's "PartyPics Now!" program has cracked the code and found a way to consistently monetize proms and other school dances!

We analyzed all the proms that took place in 2022 that had utilized PartyPics Now, and found that across dozens of proms, photographers averaged well over $2 per image taken and about $5 per guest at the prom. Not bad, considering the average number of students at any given prom was about 400 students!

The top performing proms well exceeded $2 per image and $5 per guest by doing some combination of the following things:

          • First, they used NowCandid's Selfie Check-In workflow, which gathered the guest's parent's contact data! Marketing the prom images to them as well.

          • Second, they utilized photo stations (sometimes with backdrops and/or props!) with photographer attendants in addition to roaming photographers.

          • And third, they sent 4 or more photographers to ensure they photographed every guest multiple times, making the guest's online galleries (and the larger photo packages) more appealing!

At proms where all three of those conditions were successfully met, the average sales per image was $3 and the average sales per event guest was almost $9!

So, while proms might not be quite as profitable as they were once upon a time, they can still be a great way to make some extra profit in your off season, expand your business, keep your photographers paid and busy, and more!

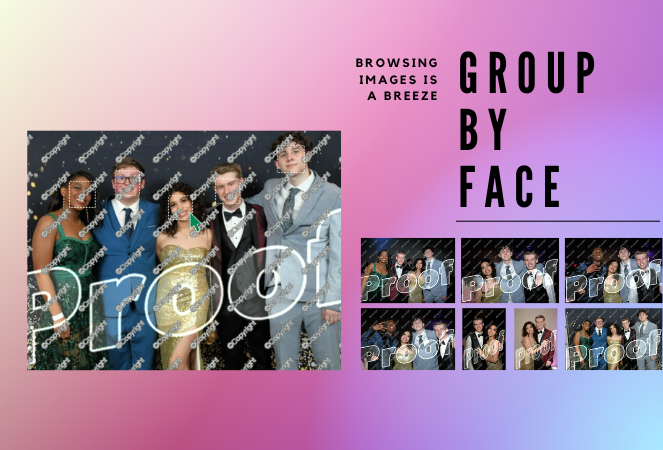
And... stay tuned! Because a new feature we're calling Group-by-Face rolls out in the very near future! Helping to take your online galleries for social events to the next level! 🎉

Have any questions? Feel free to contact us! We love to chat. 😃

Stay profitable, photographers! 📸

Cap and Gown Chronicles: Master the Art of Graduation Photography with These Expert Tips
GradPics
April 11, 2023

Cap and Gown Chronicles: Master the Art of Graduation Photography with These Expert Tips

4
 minutes read

Graduation day is a momentous occasion, marking the culmination of years of hard work, dedication, and the occasional all-nighter (we're looking at you, college students). As a photographer, you have the unique opportunity to capture these once-in-a-lifetime moments, and we're here to help you make the most of it. From technical know-how to creative flair, we've got you covered with expert tips for optimal graduation photography. And with NowCandid's Grad Pics Now program at your side, you'll be snapping insta-worthy shots in no time. So, ready your camera and let's get started!

  1. Scout the Location:
    Before the big day, visit the graduation venue to familiarize yourself with the layout and lighting conditions. Identify the best spots for group shots, candid moments, and the all-important diploma handoff. This prep work will ensure that you're in the right place at the right time to capture those precious memories.
  2. Use the Right Gear:
    Bring a telephoto lens for close-ups of the stage, a wide-angle lens for group shots, and a fast prime lens for low-light conditions. A monopod or tripod can also help steady your shots and reduce camera shake during those crucial moments and pre- or post-stage cross portraits.
  3. Find the Perfect Angle:
    Get creative with your angles to add depth and interest to your shots. But importantly, always find the right shot in order to get the graduate’s face in the photo! When using NowCandid’s face matching workflows, that’s a very important piece of the puzzle! When you can’t get a good angle, consider asking the school ahead of time to make sure the “handshaker” will always turn towards the camera and smile, prompting the graduates to do the same!
  4. Tell the Story:
    Graduation day is a rollercoaster of emotions, from anticipation to elation. Document the day's events, capturing candid moments and reactions that tell a compelling story. With NowCandid's Grad Pics Now program, you can easily organize and share these images in a personalized gallery, allowing graduates and their families to relive the day for years to come.
  5. Get Creative with Portraits:
    Graduation portraits don't have to be stiff and formal. Encourage the graduates to express themselves, whether it's a celebratory jump or a quirky pose with their diploma. These fun shots will stand out and make lasting memories.

With these expert tips and NowCandid's Grad Pics Now program in your toolkit, you'll be well-equipped to master the art of graduation photography. So, channel your inner photographer and capture the magic of the big day – because, as Ferris Bueller once said, "Life moves pretty fast. If you don't stop and look around once in a while, you could miss it." And no one wants to miss a moment as special as graduation day. Happy snapping!

Let’s get in touch

If you’re a photographer looking to add NowCandid services to your wheelhouse – set up a call by clicking the button below.

How to customize formatting for each rich text

How to customize formatting for each rich text

How to customize formatting for each rich text

How to customize formatting for each rich text

How to customize formatting for each rich text

What’s a Rich Text element?

The rich text element allows you to create and format headings, paragraphs, blockquotes, images, and video all in one place instead of having to add and format them individually. Just double-click and easily create content.

A rich text element can be used with static or dynamic content. For static content, just drop it into any page and begin editing. For dynamic content, add a rich text field to any collection and then connect a rich text element to that field in the settings panel. Voila!

Headings, paragraphs, blockquotes, figures, images, and figure captions can all be styled after a class is added to the rich text element using the "When inside of" nested selector system.

  • List One
  • List Two
  • List Three
  • List Four
  • List Five

This is a link

This is bold text