HomeNavigation arrowBlogNavigation arrow
Current page
Photography Tips

The Hidden Cost of Shipping in Volume Photography

The Hidden Cost of Shipping in Volume Photography

by Jack Counts III - NowCandid Project Manager

‍

A photography business recently switched to NowCandid from another volume photography platform...

‍

During the transition, they shared some details about how their previous software handled shipping and fees.

‍

I knew different platforms approached this stuff differently. But seeing the mechanics laid out was one of those "wait… what?" moments.

‍

In the setup they described, the photographer didn’t set the shipping charge. They didn’t get any revenue from shipping charged to their end customer. But the amount charged for shipping still increased the percentage-based fees coming out of their payout.

‍

Which is honestly kind of wild to me.

‍

It got me thinking about two sides of the same problem: what shipping costs the photographer, and what it can cost them when a customer decides not to buy.

‍

What does that shipping charge actually cost the photographer?

‍

Some volume photography platforms use lab-set shipping rates for orders delivered directly to customers. GotPhoto’s documentation (help.gotphoto.com/en/support), for example, says its direct-shipping charges are determined by the lab and automatically added at checkout.

‍

That raises a separate question: Does that shipping charge also increase the percentage-based fees coming out of the photographer’s payout?

‍

PhotoDay’s published standard pricing (support.photoday.io/en/articles) applies its 10% ecommerce fee to the total order, including products, shipping, and tax. Its reporting guide (support.photoday.io/en/articles) says customer-paid shipping goes directly to the lab.

‍

Let’s use a hypothetical order: $50 in photo products plus $10 in shipping. The customer pays $60 before tax.

‍

A 10% ecommerce fee on the products would be $5. Applying that same fee to the $10 shipping charge adds another $1, bringing the total ecommerce fee to $6.

‍

That extra dollar might not sound like much. But it means the ecommerce fee consumes 12% of the photographer’s product sales, all while the photographer doesn’t keep any shipping revenue.

‍

That’s an additional two percentage points of product revenue going toward ecommerce fees because of shipping.

‍

Here’s how that changes across a $5–$20 shipping range:

‍

How shipping affects ecommerce fees on $50 in product sales
Customer's shipping charge 10% ecommerce fee on shipping alone Total ecommerce fee on products + shipping Effective fee as a share of $50 in product sales
$5 $0.50 $5.50 11%
$10 $1.00 $6.00 12%
$15 $1.50 $6.50 13%
$20 $2.00 $7.00 14%

Illustrative calculations assume $50 in product sales and a 10% ecommerce fee applied to products plus shipping. They exclude payment processing, sales tax, and fulfillment costs.

‍

Payment processing adds another layer. Under PhotoDay’s published 2.9% processing rate, that $10 shipping charge generates another $0.29 in fees. Combined with the $1 ecommerce fee, that’s $1.29 attributable to shipping alone, equivalent to 2.58% of the $50 in product sales.

‍

Across 1,000 orders like this, that adds up to $1,000 in ecommerce fees plus $290 in processing fees attributable to shipping.

‍

To be clear, processing a larger payment costs more. That isn’t surprising. What I’m questioning is an arrangement where the photographer doesn’t set the shipping charge or keep that revenue, yet still pays percentage-based fees on it. The higher the charge, the more those fees take from the sale.‍

‍

PhotoDay does let photographers offer free economy shipping as a promotion (support.photoday.io/en/articles). Its reporting guide (support.photoday.io/en/articles) explains that the shipping charge is then deducted from the photographer’s payout. That takes the charge off the customer’s plate, but the photographer still covers the lab-set amount.

‍

And then there’s the shipping rate itself.‍

‍

I’m looking at this from the print lab side, too. NowCandid charges photographers $1.80 to ship basic small-print orders, and that already includes our margin.

‍

For comparison, Richmond Pro Lab lists $5.25 shipping through PhotoDay (richmondprolab.com/s/article) for qualifying orders under $10 in lab product cost. Against our $1.80 basic small-print rate, that’s a $3.45 difference per order, or $3,450 across 1,000 qualifying orders, before accounting for selling fees.

‍

I’m not arguing that a lab shouldn’t make money. We do, too. What bothers me is that the photographer doesn’t get to set the shipping price or share in the shipping revenue, but still pays percentage-based fees when the customer covers that charge. And offering free shipping means absorbing the lab-set amount instead.‍

‍

Either way, the photographer has limited control over a cost attached to their own sale.

‍

High shipping costs can put the whole order at risk

‍

The photography business I talked with also told me that costs for expensive-to-ship items were passed entirely on to end customers at checkout.

‍

Say someone picks out a $70 product, then discovers shipping adds another $20. Their purchase just became almost 29% more expensive, before tax.

‍

Maybe they’re fine with that. Or maybe that’s the moment they close the tab.

‍

Baymard Institute’s checkout research (baymard.com/lists/cart-abandonment) lists high extra costs, including shipping, taxes, and fees, as the top reason shoppers give for abandoning checkout, cited by 40% of respondents. That’s general ecommerce research, not a photography-specific rate, but it’s a pretty compelling reason to pay attention to the shipping line.

‍

But covering fulfillment costs doesn’t mean every dollar has to appear in the shipping field. Consider two ways to price the same purchase:

‍

Same $90 total, different shipping prices
Price breakdown Higher shipping Lower shipping
Product price $70 $85
Shipping $20 $5
Total before tax $90 $90

Hypothetical pricing example. Both options total $90 before tax; the difference is how the price is divided between the product and shipping.

‍

Same total. Different presentation.

‍

There’s research suggesting that distinction matters. A 2026 study in PLOS ONE (journals.plos.org/plosone) found a preference for free shipping even when the total purchase price stayed constant. It was a small study, but it gives us a reasonable question to test: Would customers respond better if more of the fulfillment cost were included in the product price and less appeared as shipping?

‍

For some broader context, Baymard Institute’s compilation of 50 studies (baymard.com/lists/cart-abandonment) puts average online shopping cart abandonment at roughly 70%. That’s about seven out of ten carts that never become completed purchases.

‍

In our recent internal data, NowCandid has seen roughly 3 abandoned carts for every 100 completed orders. Only about 3%!

‍

General online retail isn’t the same as volume photography, of course, and those numbers don’t prove that NowCandid’s focus on low shipping is responsible for the difference. But it’s an encouraging result! Giving your customers fewer reasons to reconsider at checkout is something we take seriously. 😎

‍

How NowCandid gives photographers more control

‍

With NowCandid, photographers can set their customer-facing shipping prices (nowcandid.com/blogs), rather than simply passing through a lab-set charge. They can also price shipping above the underlying cost to create additional margin.

‍

But having the opportunity to profit from shipping doesn’t mean you should always charge more for it.

‍

You can keep shipping very inexpensive and account for more of the fulfillment expense in your product pricing instead. That’s especially useful when you’d rather not put a large delivery charge in front of someone buying a more expensive item.

‍

We also don’t calculate our ecommerce or payment-processing percentages on collected sales tax (nowcandid.com/blogs). Collecting tax and charging additional fees on those tax dollars are two separate things.

‍

It’s about more than cheaper shipping

‍

Looking back at that conversation, what bothered me wasn’t simply that one shipping charge was higher than another. It was how little control the photographer had over something that affected both their profit and their customer’s experience.

‍

Shipping has a real cost. So does running a lab. But how that cost is priced, presented, and used to calculate fees deserves a closer look.

‍

When comparing volume photography software, I’d ask: Who sets the shipping price? Who receives that money? What fees are calculated on it? And can you change the offer your customer sees?

‍

The advertised ecommerce percentage only tells part of the story.

‍

There isn’t one perfect shipping strategy for every photography business. That’s exactly why I’d rather give photographers more room to choose their own.

‍

Shipping is part of your pricing. You should get a say in it.

‍

Thank you for attending my TED talk 🙏

Jack Counts III

NowCandid Project Manager

‍

NOTE: Platform examples reflect published policies and standard rates reviewed September 25, 2026. Terms can vary by lab, plan, promotion, or agreement. Order examples are illustrative, not reported studio results.
Related articles

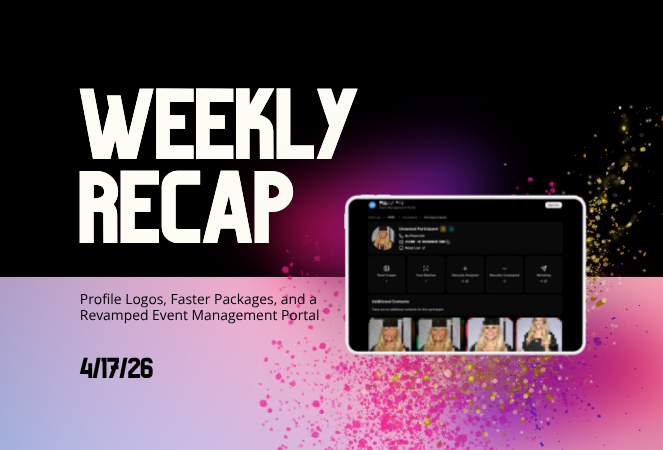
Weekly Recap: Profile Logos, Faster Packages, and a Revamped Event Management Portal
Feature Updates
April 17, 2026

Weekly Recap: Profile Logos, Faster Packages, and a Revamped Event Management Portal

5
 minutes read

Hey photo friends! 👋
‍

This week’s updates are all about cleaner branding, smoother selling, and better visibility across your workflows—from a new profile/business logo system to big package configurator performance improvements, plus a long-awaited refresh of the Event Management Portal (EMP) ahead of grad season.

‍

Let’s jump in. 💫

‍

🖥️ Dashboard Updates

📣 Client Outreach: Texts now require a URL

Client Outreach SMS messages now require a URL to be included—helping ensure every text has a clear destination and call-to-action.

🧾 Reports: “Participants” terminology restored for accuracy

The Events Report, Compare Report, and Faces Report now use Participants instead of Contacts.
Reminder: a Contact is someone with info; a Participant is a contact with at least one image in their gallery. This avoids deflating stats with unmarketable contacts.

🧰 Candy Culler usability win

  • Added a Download Image button to the Image Details lightbox on the Candy Culler page.

🖼️ Better controls in Participant lightboxes

  • Added a visibility toggle to the Image Details lightbox on the Participant Details page.

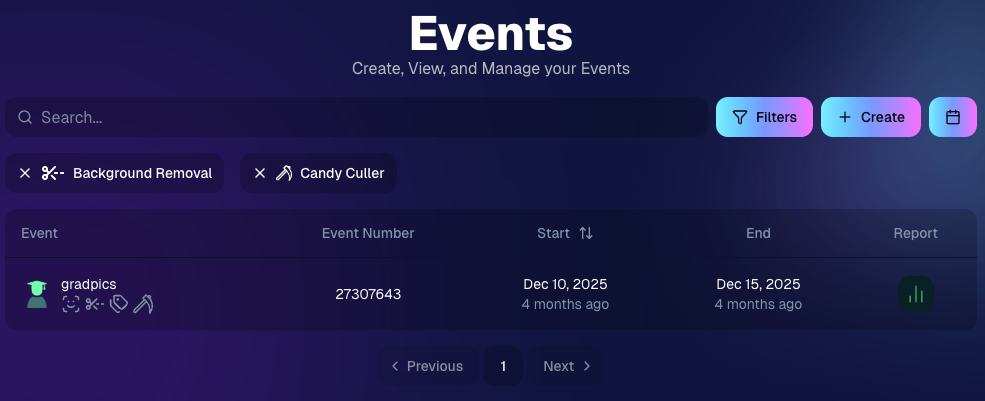
🔍 New Event List filters

The Event List page now includes quick filters for:

  • Background Removal events
  • JerseyJotter events
  • Candy Culler events

‍

🖼️ Offer background minimum lowered

You can now set your Offer background selection minimum to 5 (previously 20).

🚚 New flat-rate shipping option

Added $2.50 flat-rate shipping as an available shipping option.

‍

📱 Mobile Dashboard

  • Fixed an issue where Friday weekly sales notifications were not sending.

‍

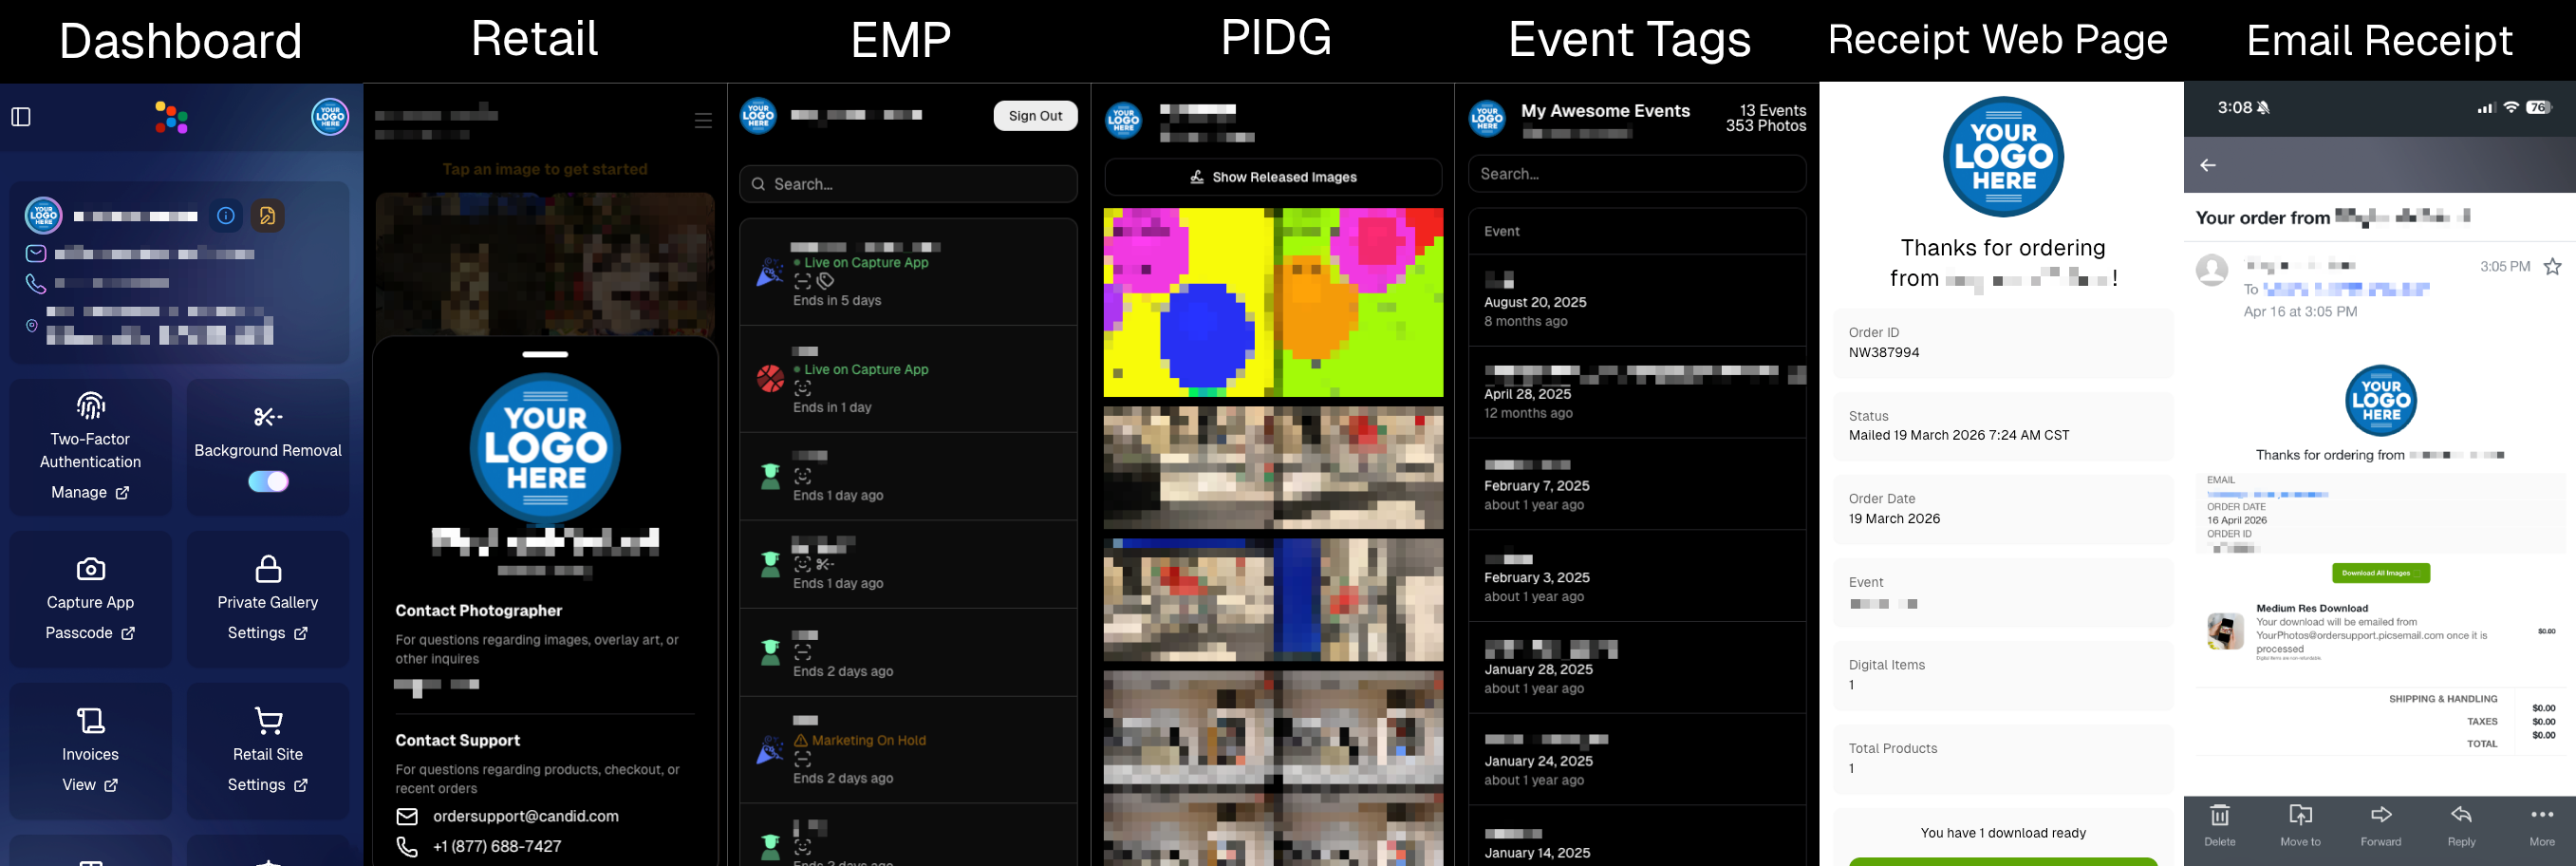
🏷️ New: Profile / Business Logos (Branding Upgrade)

You can now assign a business/profile logo—upload to your profile icon on the dashboard as a 650×650 image and automatically cropped to a circle.

Where it appears:

  • Dashboard profile page + navigation
  • Retail contact popup above your business name
  • Receipt emails, web receipt preview, and the web receipt download page
  • Event Management Portal (EMP) header beside your business name
  • Private Image Download Gallery (PIDG) header
  • Public Event Tag List page header

More placements are planned in the future—this is the first step toward a more consistent, professional brand presence everywhere your customers interact with you.

‍

🏷️ Event Tag List Page

  • Improved UI for a cleaner, easier experience.

‍

🔒 Private Image Download Gallery (PIDG)

  • Improved UI
  • Added a note to the landing popup regarding released images

‍

🛍️ Retail Improvements (Big Week for Packages + Rendering)

🖼️ Captions render earlier for key products

Graduation Plaque and Titled Luxe Prints now render custom captions earlier in the process, rather than waiting until the captions step.

📦 Package configurator upgrades

The package configurator received several improvements:

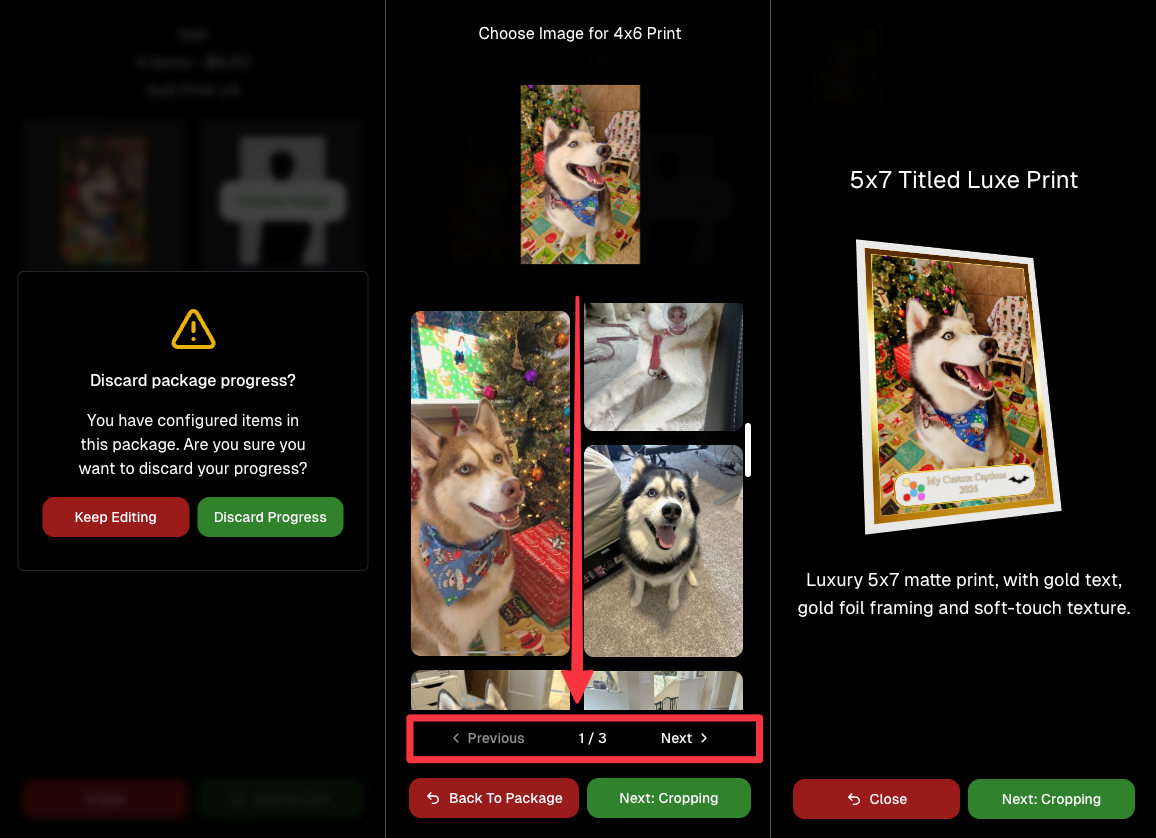
  • Added pagination to the All Gallery tab in the “Next Package Item Image Picker” step
  • Added a “Discard package progress?” popup when backing out after configuring at least one item to prevent accidental loss of progress
  • Fixed an edge-case crash on mobile when configuring large packages in offers with 3D items
  • Overall package configurating is now much more performant

‍

🧩 Z-Crop improvements

Several improvements were made to ZCrop images to improve behavior and consistency.

🏷️ Group photo refresh fix

Fixed user-added dynamic gallery group photos showing as not group after refresh.

🎨 Background order consistency

Custom offer background order now matches the order in the offer details editor—drag and drop reordering on the dashboard offer editor.

‍

📸 Capture App (iOS & Android OTA): 5.4.3 + 5.4.4

  • 5.4.3: Fixed a crash when toggling a Group Photo without any service
  • 5.4.4: Fixed a keypad popup issue on very large screens (like 13” iPad) where opt-in/cancel buttons were being cropped out

‍

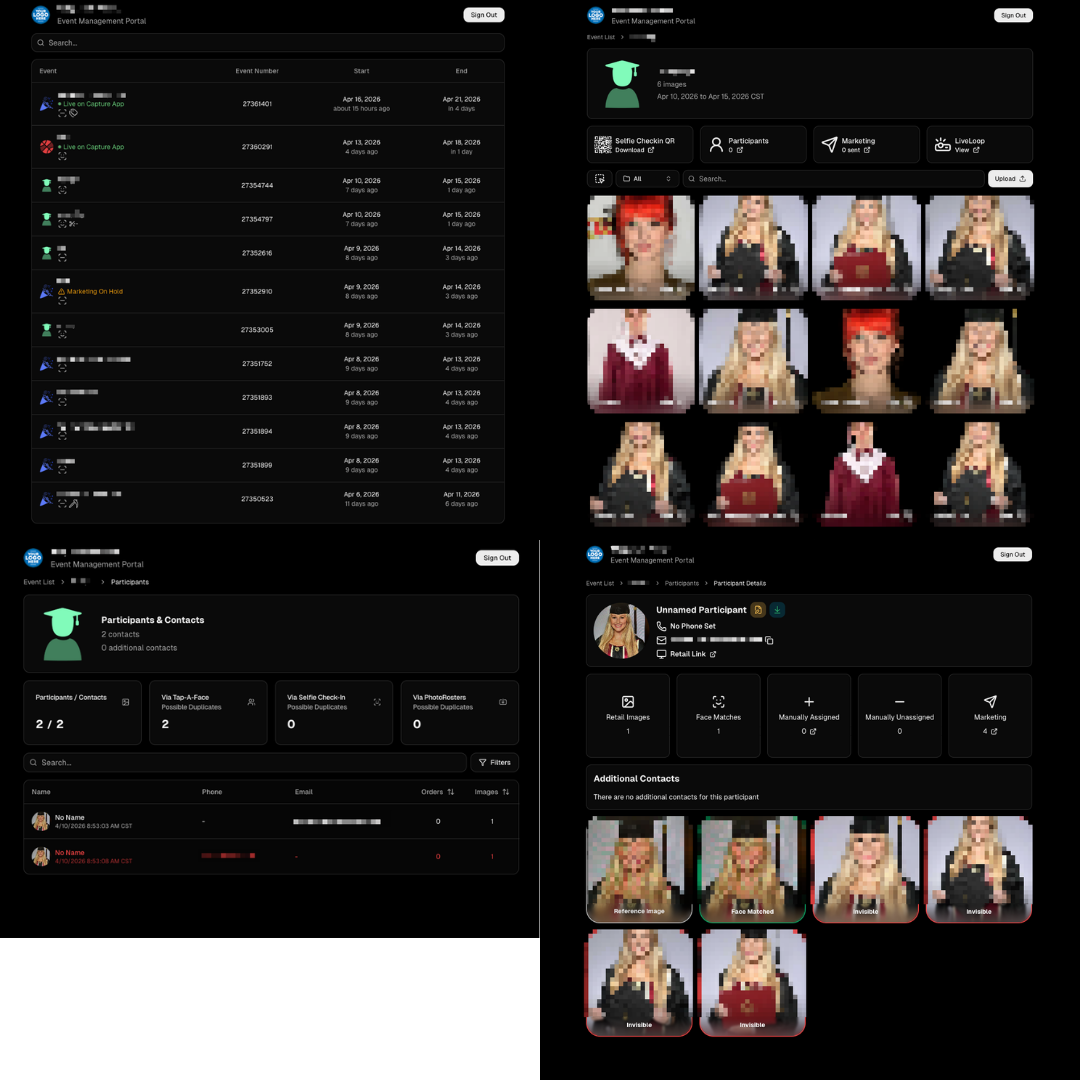
🧾 Event Management Portal (EMP) — Major Refresh (quic.pics/portal)

Quick reminder: the Event Management Portal (EMP) is a mini-dashboard on quic.pics that uses the Capture App login—so you can do “dashboard-like” tasks without downloading an app or using a full account login. It hasn’t been talked about much lately, but this week it got a big refresh in preparation for grad season.

What’s new:

  • Improved security
  • Tons of UI changes and a new dark-only theme
  • Event list page now includes a search bar
  • Event list page updated to “Live on Capture App” (instead of “Active”)
  • Event list page shows attributes like the main Dashboard + adds an Event Number column
  • Header now shows business name and logo
  • Fixed a crash on the Marketing History page
  • Added text/email filter on Marketing History
  • Images now use lightboxes with arrow key navigation
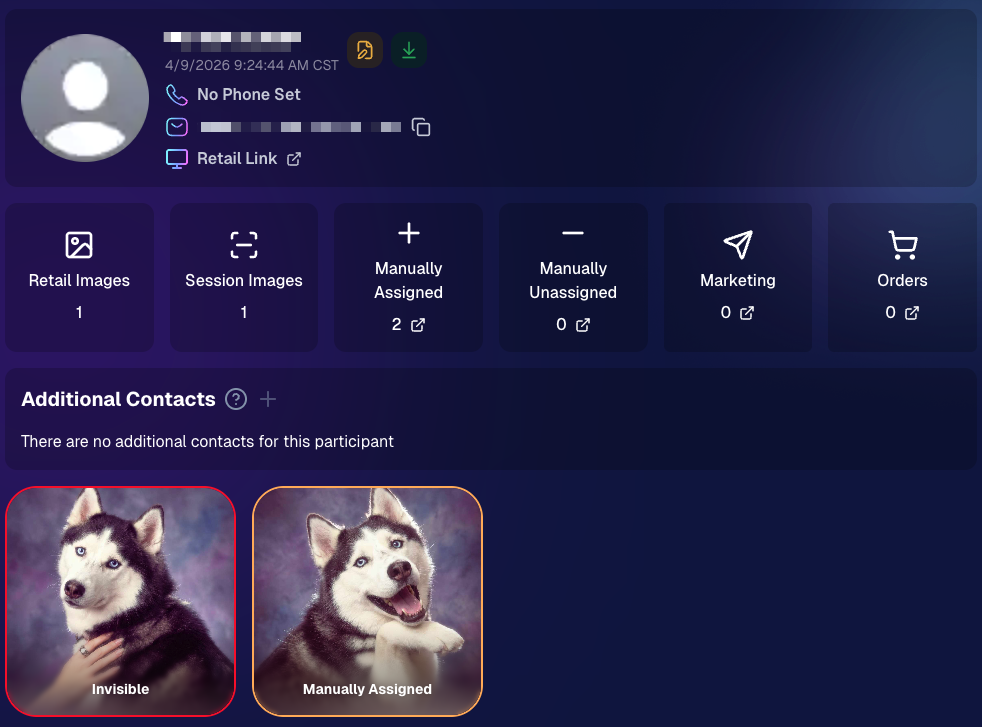
  • Participant Details now shows Additional Contacts
  • Participant Details now shows Invisible images

‍

That’s the week! 💫

‍

Between profile/business logos, a smoother package configurator, better report accuracy, and the EMP glow-up for grad season, this update should help you move faster, look more professional, and reduce friction across the whole customer experience.

‍

Keep creating magic,
— The NowCandid Team 🍬

‍

Weekly Recap: Titled Luxe Prints, Zoom Cropping, and Candy Image Studio “From Scratch”
Feature Updates
April 10, 2026

Weekly Recap: Titled Luxe Prints, Zoom Cropping, and Candy Image Studio “From Scratch”

5
 minutes read
Hey photo friends! 👋

This week’s updates are a fun mix of new products, new visual workflows, and small-but-important fixes that make day-to-day work smoother—especially across Candy Image Studio, retail packages, and PhotoRoster/PhotoTag downloads.

Let’s jump in. ✨

‍

📣 Dashboard: Client Outreach + Workflow Quality-of-Life

Client Outreach email history is easier to use and more reliable:

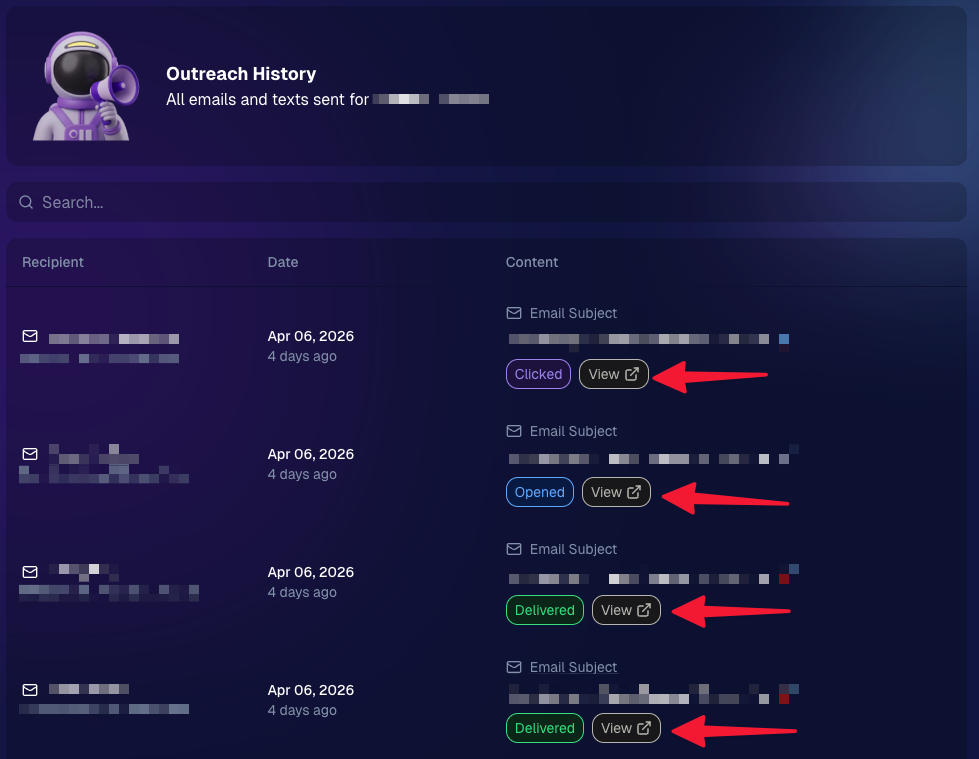
  • Added a “View” button in Client Outreach email history so you can open the sent email in a new tab (similar to how order receipts work).
  • Fixed an issue where email status didn’t always show for all emails in the status list.

‍

More clarity when reviewing participant galleries:

  • The Participant Details page now shows invisible images, clearly marked in red with an “Invisible” label—so you can understand what’s hidden without guessing.

‍

PhotoTag participant gallery downloads got safer:

  • Fixed PhotoTag participant gallery downloads overwriting images when multiple files shared the same frame.
  • Fixed the download count displayed on the download button being off.

‍

🎨 Candy Image Studio: Create Without an Input + A New Node

Candy Image Studio has two notable upgrades this week:

🧠 No input image required (generate from scratch!)
Candy Image Studio no longer requires an input image to get started. You can generate from scratch using the “From Scratch” node (at the very bottom), or by starting from custom text or a custom image—great for things like creating portrait backgrounds or creative assets.

‍

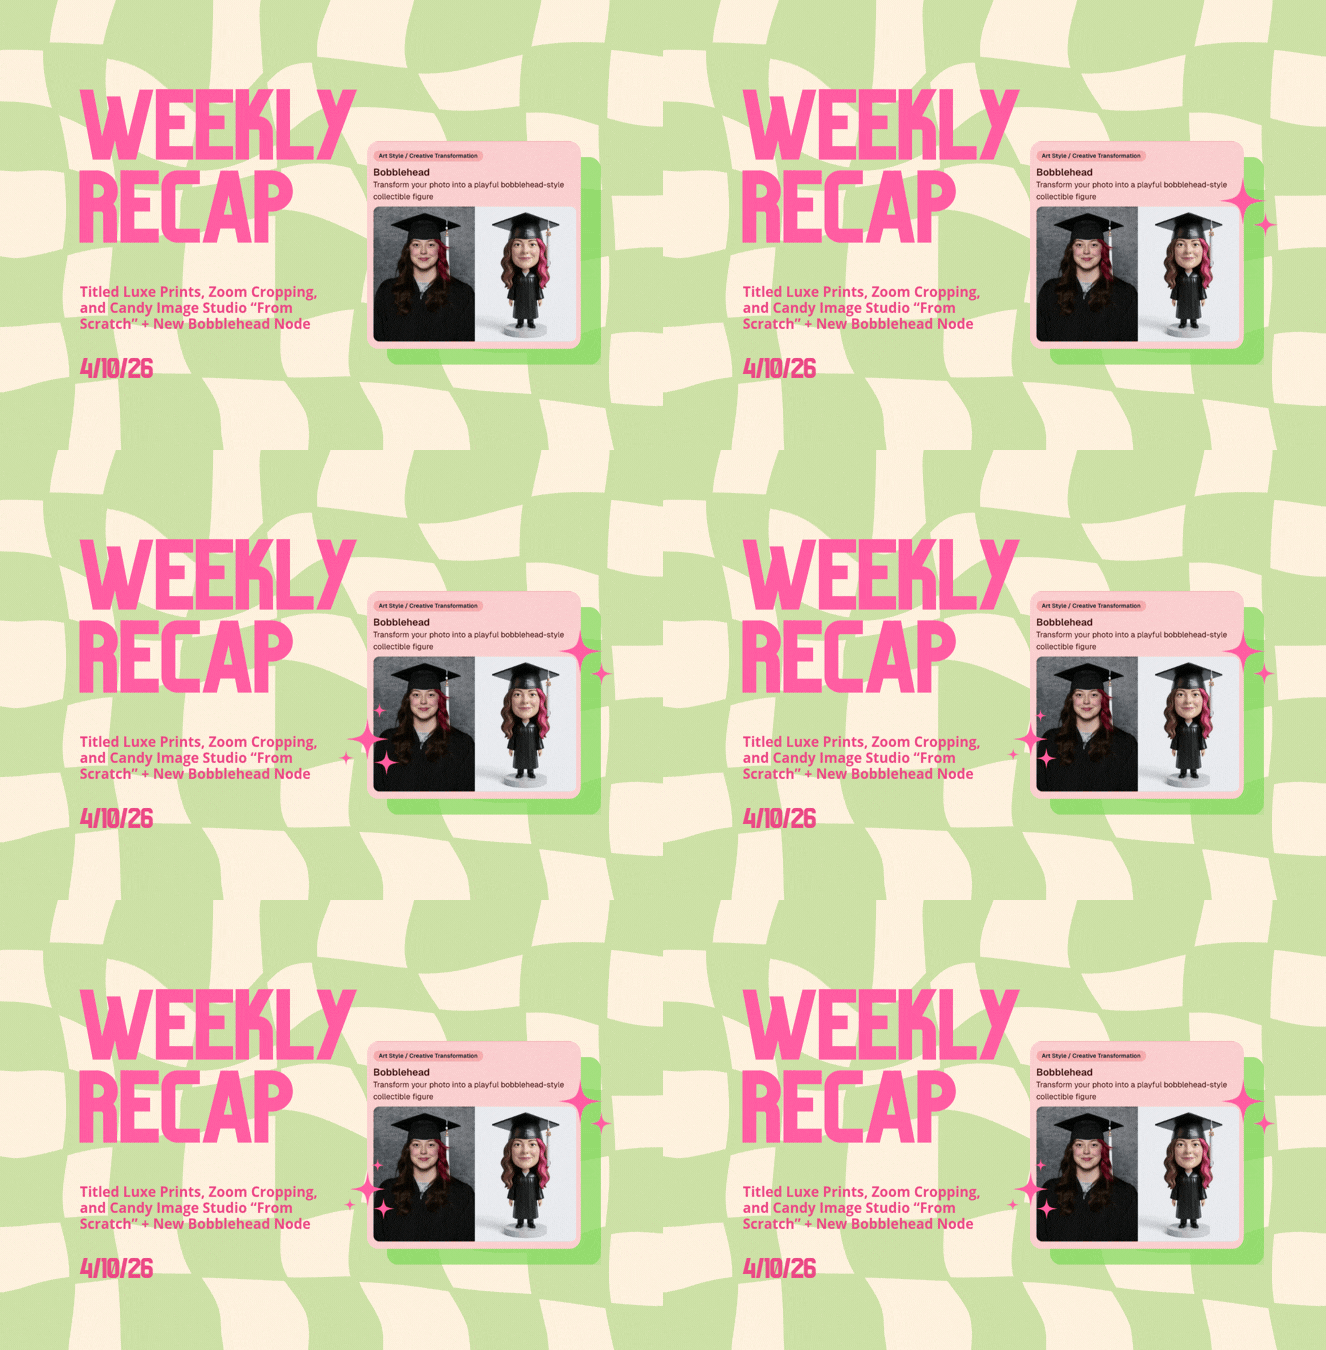
🆕 New “Bobblehead” node
A brand-new Bobblehead node is now available inside Candy Image Studio.

Disclaimer: This is not a new product. This is an image node in the Candy Image Studio.

‍

🏈 Jersey Jotter + Event Settings Cleanup

Jersey Jotter settings were removed from the Create/Edit Event popup.
Since Jersey Jotter now has its own dedicated page, we pulled those settings out of the event popups to keep Create Event as minimal (and fast) as possible—and keep Edit Event aligned with Create.

New: “Auto Enhance” can be turned off in Create/Edit Event.
Important clarity here:

  • Auto Enhance isn’t new — it has always been enabled by default.
  • What’s new is the ability to turn it off from the Create/Edit Event popup.
  • It’s labeled “Auto Enhance” (not “Retail Enhancement”) because it affects more than retail, including things like LiveLoop, Dashboard previews, Shareable Download Gallery, and more.
  • Note: this setting only impacts images uploaded after you change it. (So anything already uploaded keeps whatever enhancement state it had at upload time.)

‍

🛍️ Retail: Package Backgrounds + Fixes

A few retail improvements landed to reduce confusing edge cases:

  • When selecting a PNG (without a faux background render) during the “Next Package Item Image Picker” step, the chosen background will now default to the first background in the background picker list (instead of the purple default).
  • Fixed an issue where the background selector step didn’t always appear for non-faux BGR images.
  • Fixed a crash related to having Wall Clings in packages.
  • Updated the Free Download description to: “Free simple, full-resolution download of your image.” (Previously it implied lower resolution.)

‍

🔍 NEW: Zoom Cropping “Z-Cropping” (Dashboard + Retail)

In Advanced Offer Settings, you can now enable Zoom Cropping, which automatically adds an additional image into the customer’s gallery that is zoom-cropped toward their face.

Details & rules:

  • ✅ Works on Face Matching Events
  • ✅ Works only on images with one face
  • ✅ All default graduation offers/price levels now have Zoom Cropping enabled
  • Behind the scenes, it applies a ~30% zoom toward the face, with an additional ~30% pull from the center of the image toward the face (clamped to avoid cropping beyond image bounds)

This is a great “quiet upgrade” for grads and portrait-style moments where customers love a tighter crop—without you needing to manually create it.

‍

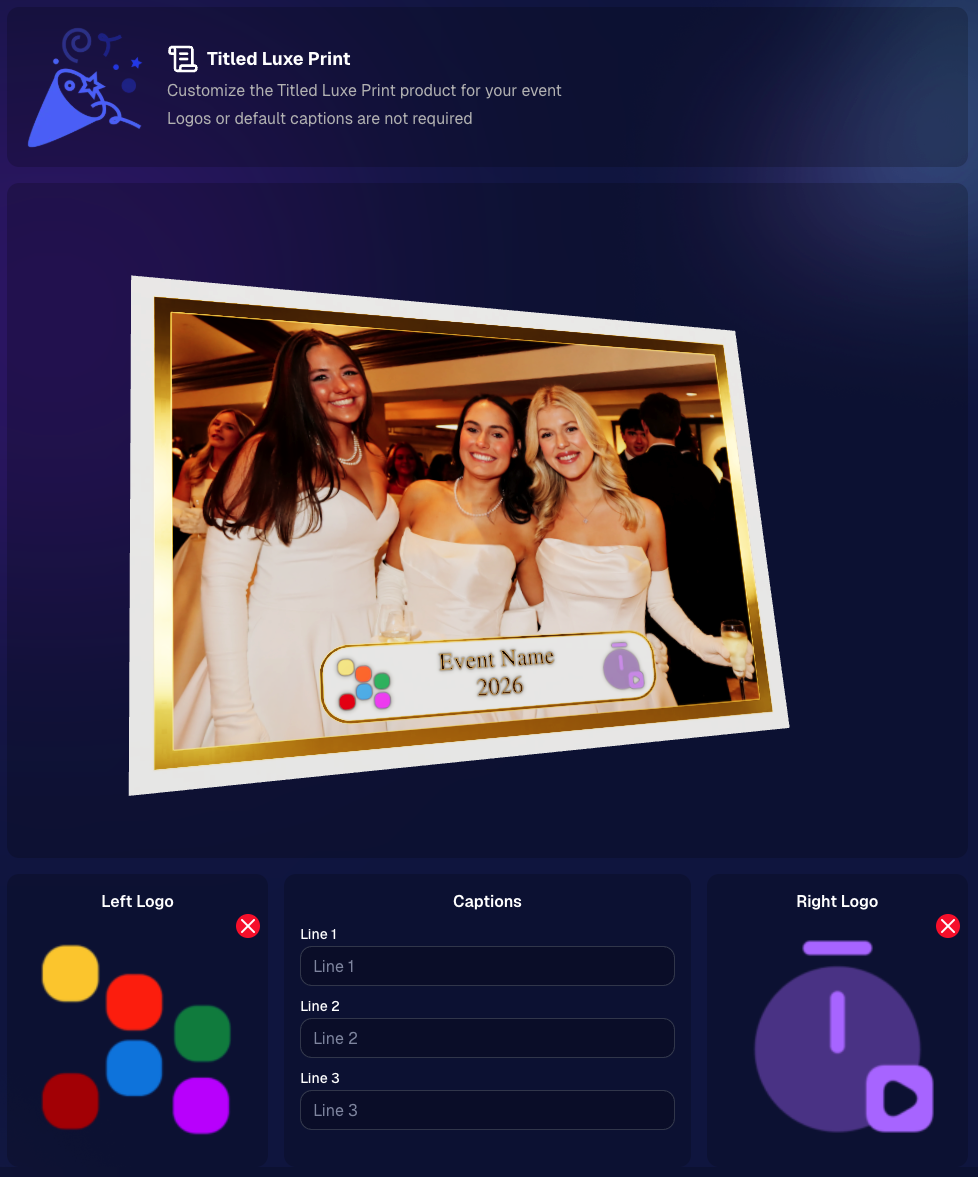
🖼️ New Products: Titled Luxe Prints (Dashboard + Retail)

Two new products just landed:

  • 5×7 Titled Luxe Print
  • 8×10 Titled Luxe Print

‍

Want to see the 3D preview?
https://app.nowcandid.com/3d/titled-luxe-print

‍

New: “Edit Titled Luxe Print” Page (per event)
There’s a new event-level page available in the Dashboard sidebar only if one of the new titled products is included in the event’s offer. From there, you can:

  • Set default captions
  • Select left/right logos
  • Preview the 3D render
  • (Easter egg: rotate the render and you can spot your business name on the backprinting.)

‍

Notes:

  • Default captions and logos are optional
  • Retail shoppers can change captions when ordering
  • Logo requirements: upload/import a 650×650 transparent PNG
  • Retail supports both 2D + 3D renders, including your custom logos
  • Order Details pages now display the selected logos, similar to how we show captions and colors

‍

That’s the week! 💫

Between Zoom Cropping, Titled Luxe Prints, and Candy Image Studio’s new From Scratch flow (plus a pile of cleanup across retail + downloads), this update adds a lot of power without adding extra complexity.

‍

Keep creating magic,
— Candy 🍬

‍

Big News: Introducing Client Outreach 🚀📣
Feature Updates
April 3, 2026

Big News: Introducing Client Outreach 🚀📣

6
 minutes read
Hey photo friends! 👋

‍

This is a big one.

‍

We’re excited to introduce Client Outreach — a brand-new tool that lets you reach your customers directly with one-off texts and emails, completely separate from your normal event marketing.

‍

Whether you’re following up after an event, promoting future bookings, or nudging people who missed check-in… this gives you a simple, flexible way to stay connected.

‍

Let’s break it down 👇

‍

📣 What is Client Outreach?

‍

Client Outreach lets you:

‍

📩 Send one-off emails and texts

‍

👥 Build contact lists from:

  • Existing events
  • Uploaded spreadsheets
  • Or both combined

‍

🎯 Filter contacts based on:

  • Contacts with matched images
  • Contacts without matched images
  • Or everyone

‍

This is not automated campaign messaging — it’s intentional, targeted outreach when you need it.

‍

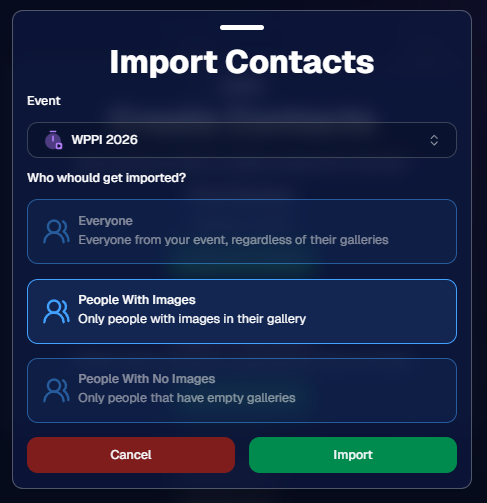
👥 Build Your Audience, Your Way

‍

When creating an outreach list, you’ve got flexibility:

‍

  • Pull contacts from one event, multiple events, or none
  • Upload your own spreadsheet of contacts
  • Combine both sources into one list

‍

And when using events, you can choose:

‍

  • Only people with images
  • Only people without images
  • Or everyone

‍

That opens the door to some really useful workflows (more on that below 👀).

‍

__wf_reserved_inherit

‍

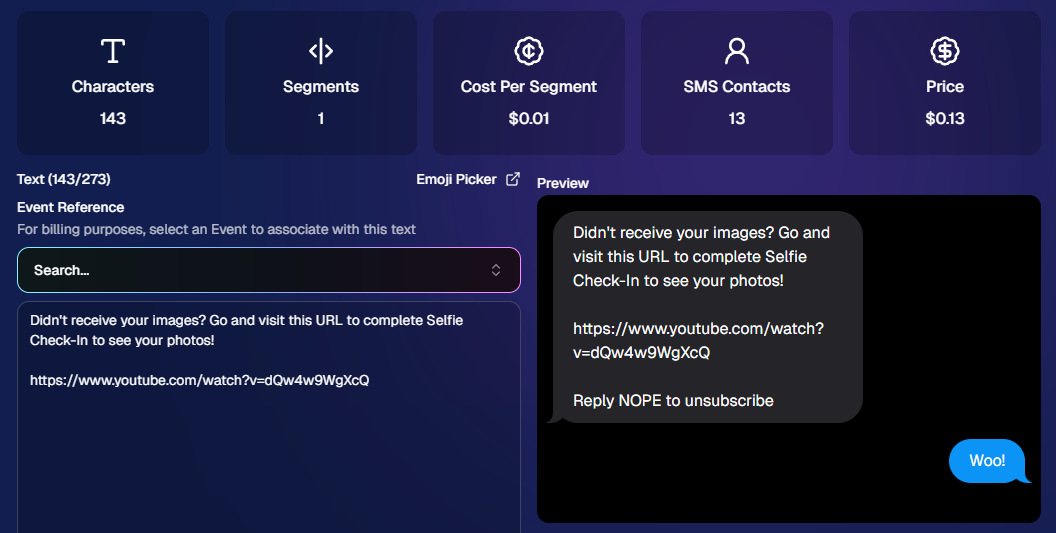
💬 SMS Outreach (Simple & Familiar)

‍

Sending texts is designed to feel easy and familiar.

‍

🧾 Uses a FreePics-style editor + preview

‍

✍️ Write your message and send to your list

‍

🔗 Include links (galleries, check-in, etc.)

‍

💵 Pricing:

‍

$0.01 per segment, per text

‍

A segment is roughly:

  • ~140 characters (standard text)
  • ~65 characters (if using emojis)

‍

Longer messages may use multiple segments (typically 2–4).

‍

__wf_reserved_inherit

‍

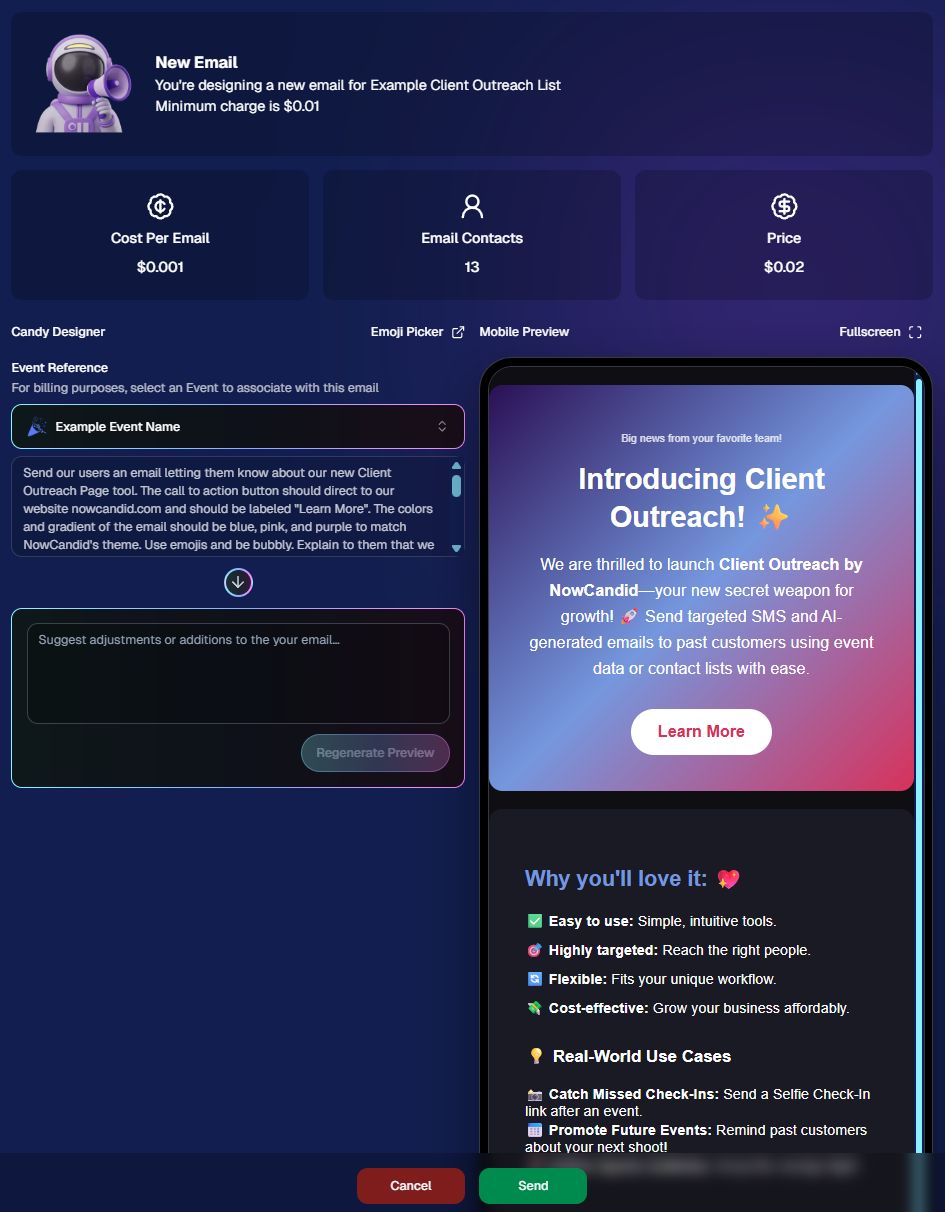
📧 Email Outreach (Powered by Candy 🤖)

‍

This is where things get really fun.

‍

Instead of building emails manually…

‍

👉 You just describe what you want, and Candy builds the email for you.

‍

✨ How it works:

‍

Tell Candy things like:

‍

  • What the email should say
  • What tone you want (fun, professional, urgent, etc.)
  • What your call-to-action button should say
  • Where that button should link

‍

Candy will:

‍

✍️ Write the email

‍

🎨 Design the layout

‍

🧠 Generate a subject line

‍

🏷️ Pull in your business info automatically

‍

No HTML. No formatting headaches. Just describe it.

‍

🧠 Even Smarter with Events

‍

Every outreach must be tied to an event (for billing/history), but that unlocks some extra power:

‍

If your outreach is related to that event, Candy can pull in things like:

‍

🔗 Check-in links

‍

🖼️ Cover photos

‍

🖼️ Gallery links

‍

And more!

‍

👉 You can still override this and use your own URLs — Candy will follow your instructions.

‍

📬 Sending Details

‍

Emails are sent from:
your-business-name@quic.pics

‍

Your business name is prominently shown in the inbox

‍

You can edit the subject line Candy generates before sending

‍

💵 Email Pricing

‍

$0.01 per 10 emails (rounded up)

‍

Examples:

  • 10 emails = $0.01
  • 11–19 emails = $0.02

‍

🖼️ Bonus Tip: Include Images in Emails

‍

If you have direct image URLs, you can give them to Candy and ask her to include them in the email.

‍

Not sure how to get those? Google is your friend on this one 😄

‍

📊 Track Performance

‍

Just like order receipts, you can see:

‍

👀 Opens

🖱️ Clicks

❌ Bounces

‍

So you know what’s working.

‍

__wf_reserved_inherit

‍

💡 Real-World Use Cases

‍

Here are just a few ideas:

‍

📸 Catch Missed Check-Ins

Send a Selfie Check-In link after an event using a roster from a school or organizer.

‍

📅 Promote Future Events

Reach past customers and say:
“Hey, we’re photographing again next week!”

‍

🏈 Action Sports Galleries

Send All Images Gallery links when using Jersey Jotter (where face matching isn’t ideal).

‍

🧑‍🤝‍🧑 New Group Photos Added

Let people know:
“Your group photos are now live!”

‍

📝 Post-Event Surveys

Send feedback forms to improve your next event.

‍

🔔 Picture Day Reminders

Get ahead of the event with reminders to increase participation.

And that’s just scratching the surface.

‍

🎯 Simple, Flexible, Powerful

‍

Client Outreach is designed to be:

‍

✅ Easy to use

‍

🎯 Highly targeted

‍

🔄 Flexible for different workflows

‍

💵 Cost-effective

‍

You’re in control of when, who, and what you send.

‍

This is one of those tools that grows with you — whether you’re running small events or large-scale operations.

‍

We can’t wait to see how you use it! 👀

‍

More soon,‍

Candy 🍬

Let’s get in touch

If you’re a photographer looking to add NowCandid™ services to your wheelhouse, set up a call with us!

How to customize formatting for each rich text

How to customize formatting for each rich text

How to customize formatting for each rich text

How to customize formatting for each rich text

How to customize formatting for each rich text

‍

‍

What’s a Rich Text element?

The rich text element allows you to create and format headings, paragraphs, blockquotes, images, and video all in one place instead of having to add and format them individually. Just double-click and easily create content.

A rich text element can be used with static or dynamic content. For static content, just drop it into any page and begin editing. For dynamic content, add a rich text field to any collection and then connect a rich text element to that field in the settings panel. Voila!

Headings, paragraphs, blockquotes, figures, images, and figure captions can all be styled after a class is added to the rich text element using the "When inside of" nested selector system.

  • List One
  • List Two
  • List Three
  • List Four
  • List Five

This is a link

This is bold text

‍

  • ‍

‍