Weekly Recap: Virtual Group Builder, Client Outreach Updates & Smarter Retail Support 🎉📸
.png)
Hey photo friends! 👋
This is a big week! The headline feature is one many sports and volume photographers are going to love: An all-new Virtual Group Builder is now available directly on the Dashboard.
We’ve also added new Candy Image Studio tools, improved Client Outreach behavior, refreshed image assignment tools, and made retail support easier for shoppers and photographers alike.
Let’s jump in!
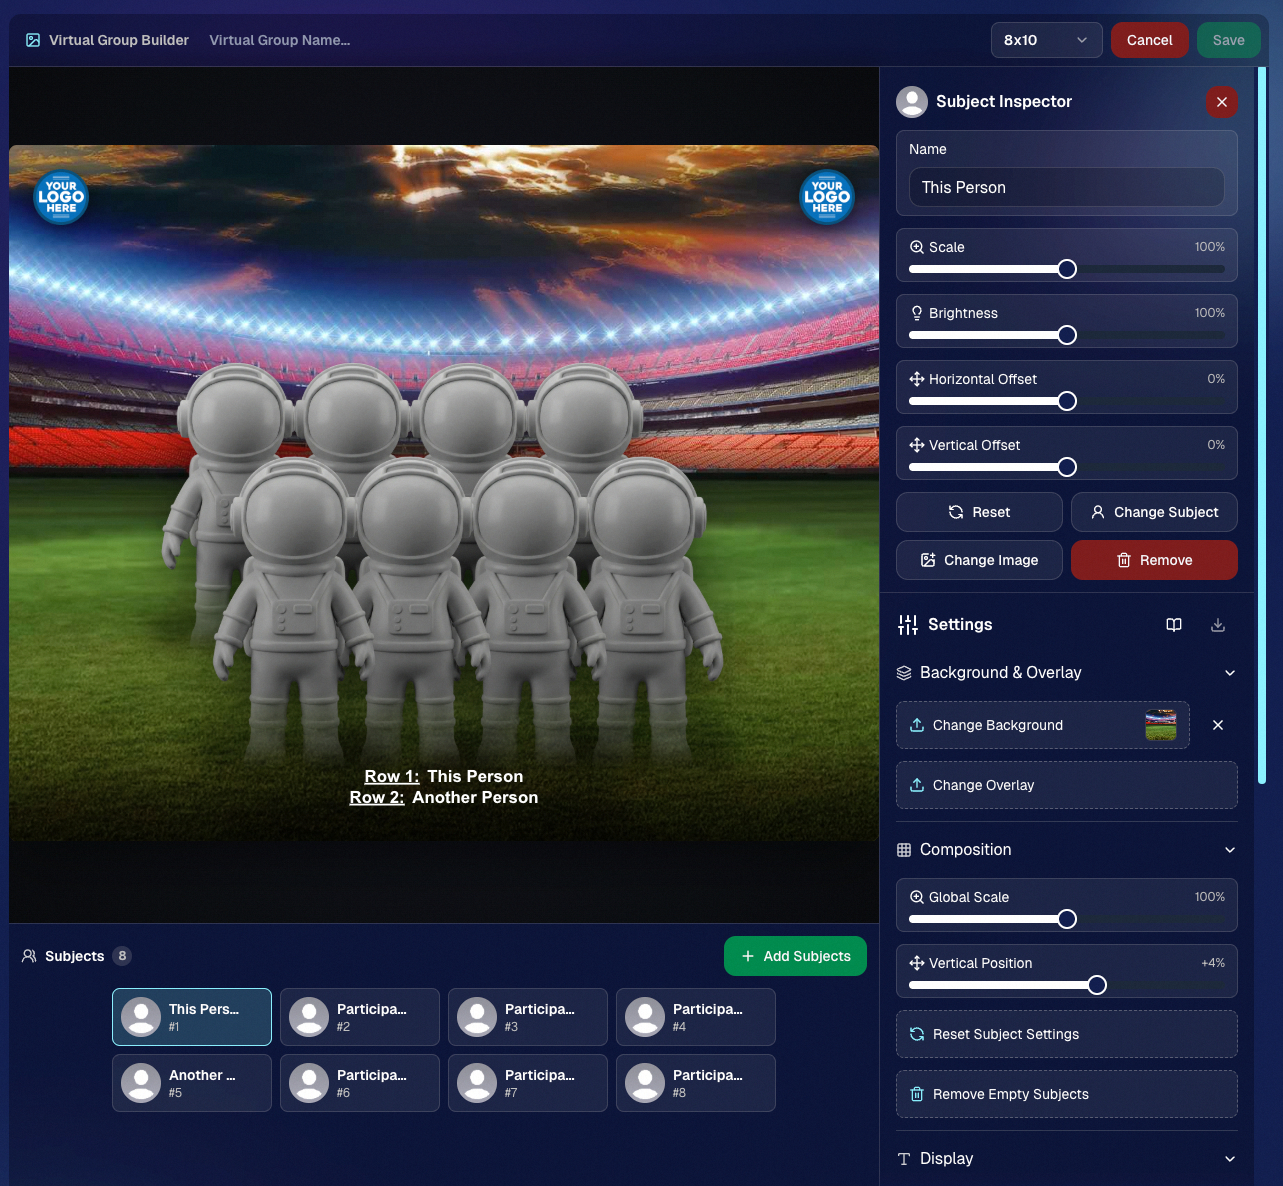
🧑🤝🧑 Big New Feature: Virtual Group Builder
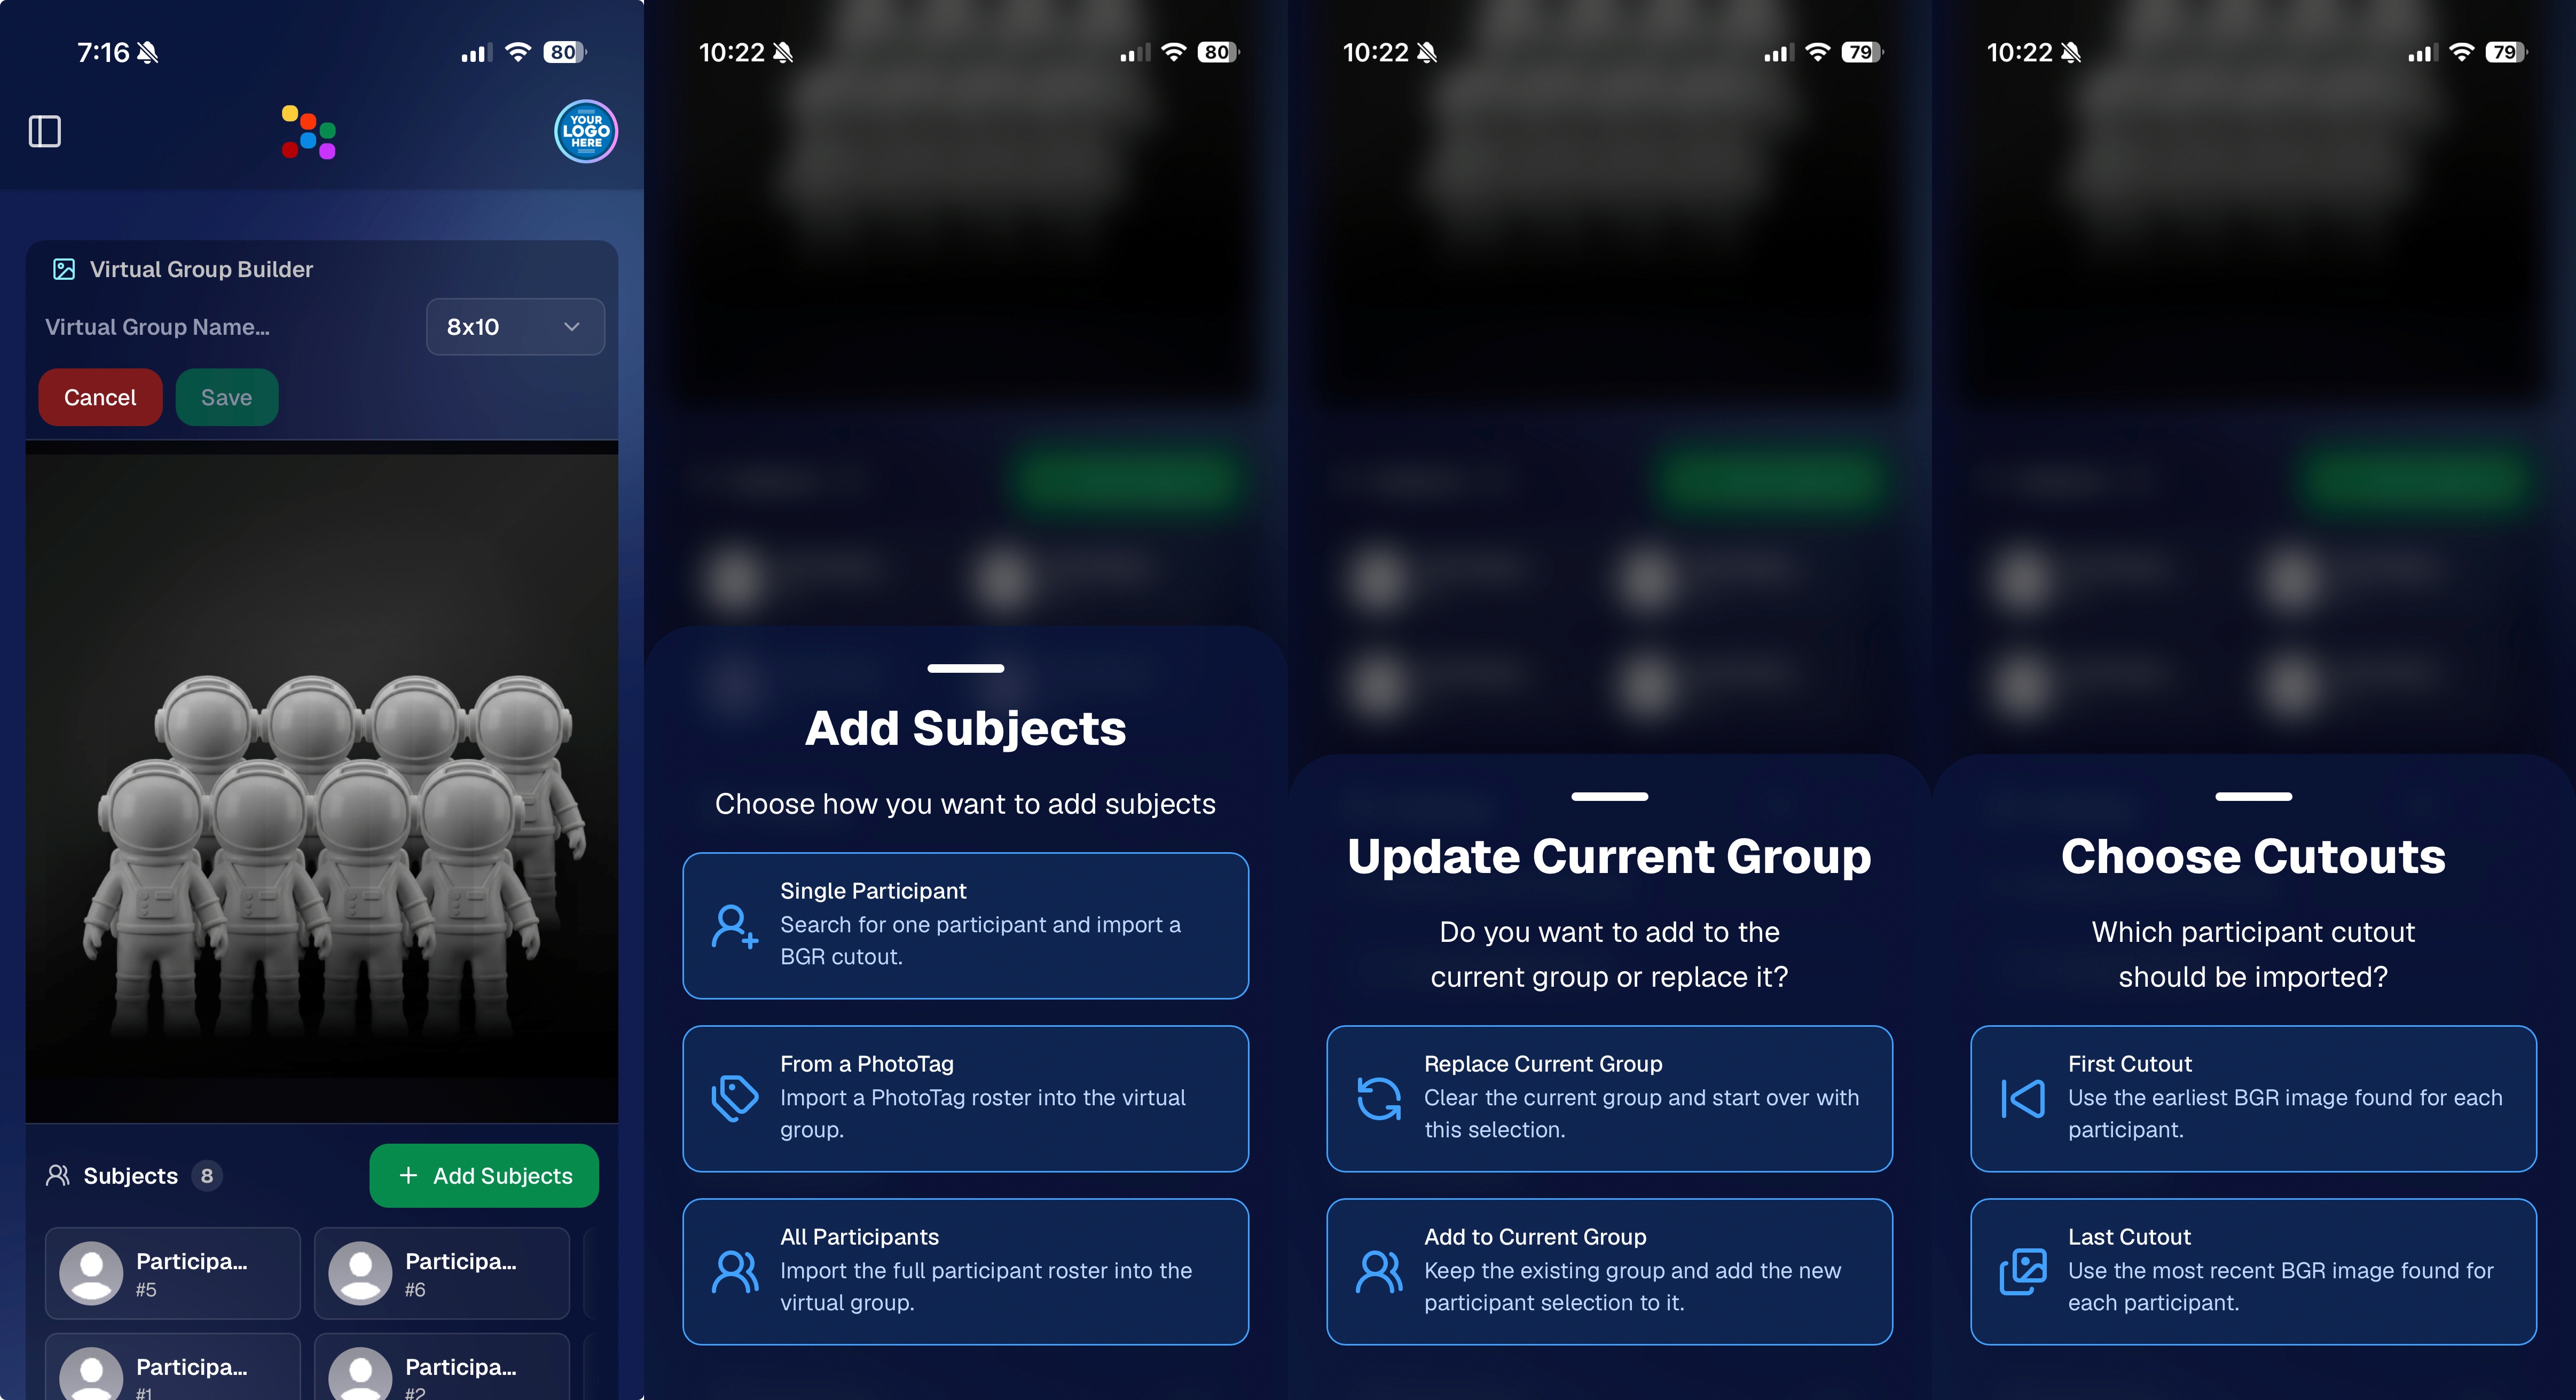
You can now build Virtual Groups directly on the Dashboard — with Mobile Dashboard support too!
Find it from an Event page by clicking Virtual Groups in the sidebar menu.
With Virtual Group Builder, you can:
👥 Import participants from the full Event, one at a time, or everyone with a specific PhotoTag
✂️ Use participant cutouts to build polished group images
🏷️ Build groups quickly when your Event has consistent cutouts and participants tagged with PhotoTags
🖼️ Create Virtual Groups in 4×6, 5×7, 8×10, or 11×14 formats
🎨 Choose from NowCandid default backgrounds, upload custom backgrounds, and add overlays
🧢 Add account logos to the corners
🔤 Toggle subject names on or off
📐 Preview crop lines and aspect ratio lines
🖱️ Zoom, pan, drag, reorder, resize, brighten, and position subjects
You can also adjust group-level settings like background, overlay, overall scale, vertical position, bottom shadow falloff, and individual cutout fade to help hide cropped legs.
When your Event is set up cleanly with cutouts and PhotoTags, you can create a full Virtual Group in just a few clicks. ✨
Docs page: https://app.nowcandid.com/docs/image-management/virtual-groups
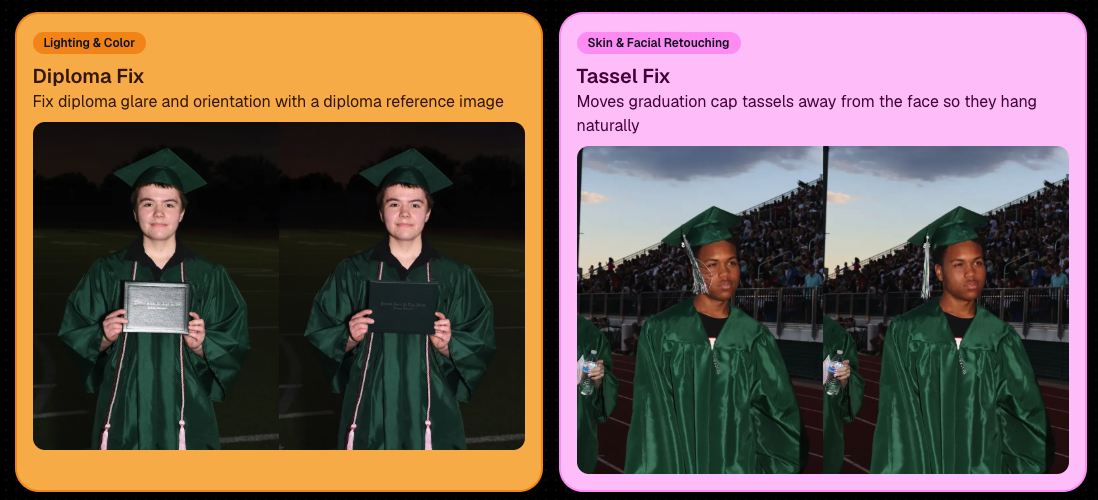
🎓 Candy Image Studio: New Graduation Tools
Candy Image Studio got some very timely upgrades for graduation season:
🎓 New “Diploma Fix” node
- Helps fix diploma orientation and glare. You’ll need to upload a reference diploma so Candy knows what the diploma should look like, including details like school name, emblem, fonts, and colors.
🎗️ New “Tassel Fix” node
- Helps adjust graduation tassels that are covering a subject’s face — similar to Stray Hair Removal, but tailored specifically for grad tassels.
👓 Improved Reduce Glass Glare
- This node is now more reliable and less likely to accidentally add glasses to subjects who aren’t wearing them.
📣 Client Outreach Improvements
Client Outreach got a few useful updates to help save money and keep lists cleaner:
🚫 Unsubscribed contacts excluded by default
- Imported Client Outreach contacts now exclude unsubscribed contacts unless you choose to include them.
🔘 New “Include unsubscribed contacts” toggle
- You can still include them if needed, but the default helps avoid spending on contacts who can’t receive your outreach.
👀 Show Hidden on Client Lists
- The Client Outreach list page now has a Show Hidden option, similar to Offers and PhotoRoster organizations.
🧭 Client List sidebar shortcut
- The Client Outreach sidebar item now takes you back to the Client List page more clearly.
🖼️ Image Management & Dashboard Upgrades
🧩 Image Release Gallery redesign
- The Image Release Gallery now uses a masonry layout like retail, supports lightboxes with arrow key navigation, has CMD/CTRL+F search support, and saves filters in the URL.
🧑💻 Manual Assignment page refresh
- The Participant Manual Assignment page has a cleaner, more intuitive UI.
⭐ Camera star ratings on Image Details
- If your camera includes star ratings, they now appear on the Image Details page.
⬇️ Image Details convenience buttons
- Image Details now includes quick actions to download or open in Candy Image Studio.
🏷️ PhotoTag ampersand fix
- PhotoTag names with ampersands now save correctly.
🧍 Merged participant name fix
- Manual Assignment now shows the selected participant’s name instead of the first merged participant’s name.
🔙 Event sidebar remembers filters
- When going back to the Event List from an Event Overview page, your filters are remembered as long as you haven’t refreshed.
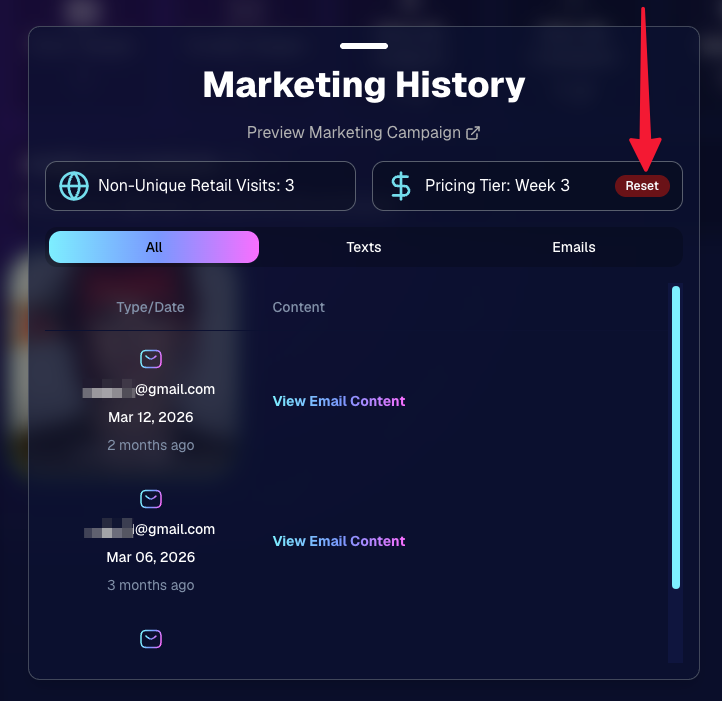
🔁 Pricing tier reset button
- Participant marketing history now includes a button to reset a participant’s pricing tier start date, useful if support wants to re-offer first-week pricing.
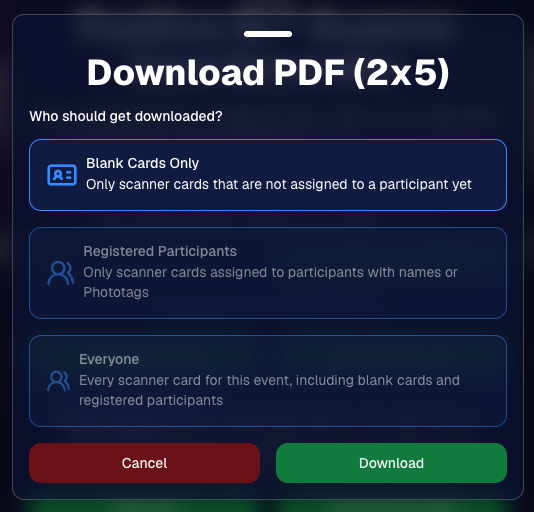
🪪 Positive ID QR Code downloader options
- You can now download blank cards only, registered participants only, or everyone, making scan card PDFs easier to manage for multi-workflow sports events.
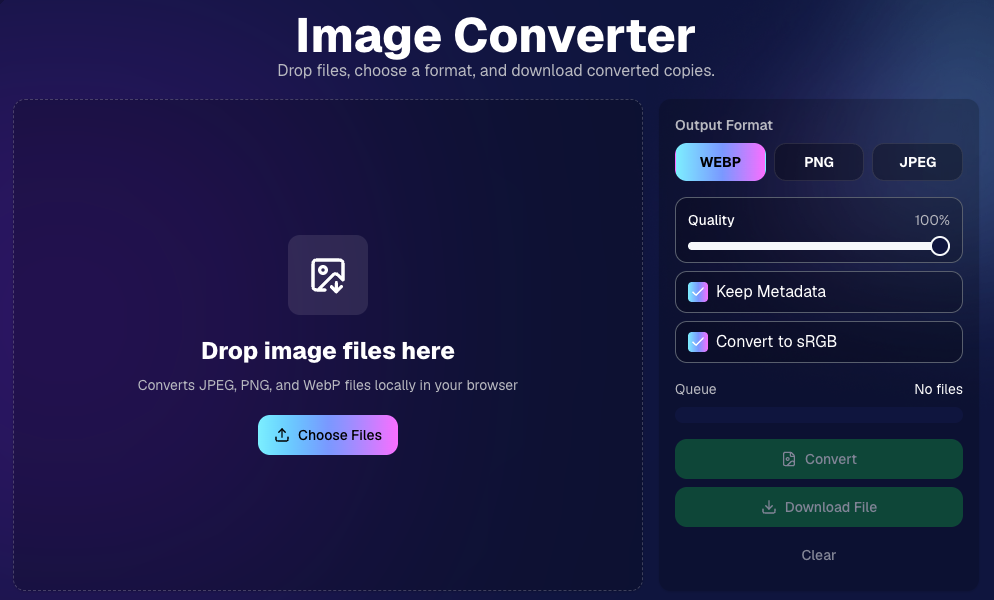
🛠️ New Tool: Image Converter
There’s a new tool under Tools & More → Image Converter.
Use it to:
🔄 Convert images to WEBP, PNG, or JPEG
🎨 Convert images to sRGB
Handy for preparing files before uploading them to NowCandid Events.
📚 New Capture App Camera Docs
We added a dedicated docs page for confirmed camera models that work with the Capture App.
More cameras may work than what’s listed, but this page focuses on models we’ve confirmed.
Docs page: https://app.nowcandid.com/docs/capture-app/cameras
🛍️ Retail Improvements
📬 New Contact Us form on retail
- The Contact Us popup now includes a form that sends support an email with helpful details automatically included, such as browser info, window size, retail link, Event details, and order number when available. This should make support faster and reduce back-and-forth.
🖼️ Overlay step now comes before cropping
- This prepares retail for future improvements while keeping product customization clearer.
🗓️ Smarter Year captions
- Certain products now default the Year caption to the Event start year or participant Day 0 year instead of the current year. Helpful for late-December events or older graduation galleries.
🌍 International order fix
- Fixed an edge case where some international orders could send multiple receipts and incorrectly show that the order wasn’t submitted.
🤳 Selfie Check-In & Capture App Updates
📶 Clearer Selfie Check-In upload errors
- If a selfie upload fails, subjects now see a more specific error reason — like upload speed being too slow — so they know what to try next.
📱 Capture App 5.6.3 OTA update
- Contact Info Settings now says Tap-A-Face or Type & Take based on the Event program
- The 1000×1000 reference image requirement has been removed for Selfie Check-In Station and Roster Check-In, especially helpful for Android devices with lower-resolution cameras
That’s the week!
Virtual Group Builder is the big one, especially for sports and volume workflows — but between Client Outreach, Candy Image Studio, Image Converter, and retail support improvements, there’s a lot here to make your next Event easier to manage.
Keep creating magic,
Candy 🍬


.svg)


