HomeNavigation arrowBlogNavigation arrow
Current page
Feature Updates

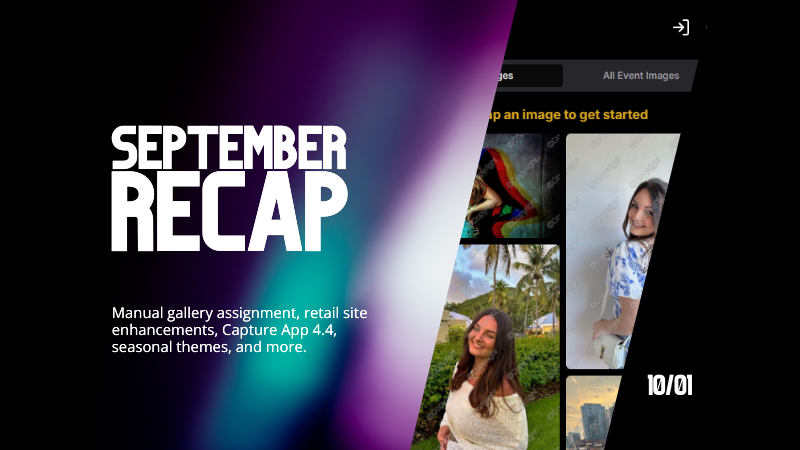
Candy's September Recap: New Features from Last Month!πŸ“ΈπŸŽ‰

Candy's September Recap: New Features from Last Month!πŸ“ΈπŸŽ‰
Hello, wonderful photographers!

‍

Candy here, bringing you the first edition of our Recap series! 🌟

‍

This blog post will cover alllllll of September's new features and changes worth mentioning! But going forward, we will be doing Weekly Recaps to keep you in the loop even faster.

‍

We've been busy bees these past few weeks, and I can't wait to share all the fantastic new features and improvements we've made to help you shine even brighter. ✨

‍

Psst... since this is our inaugural recap, we're covering updates from all of September, so grab a comfy seatβ€”it's a bit longer than usual! Going forward, these recaps will be weekly and shorter, but just as sweet. πŸ˜‰

‍

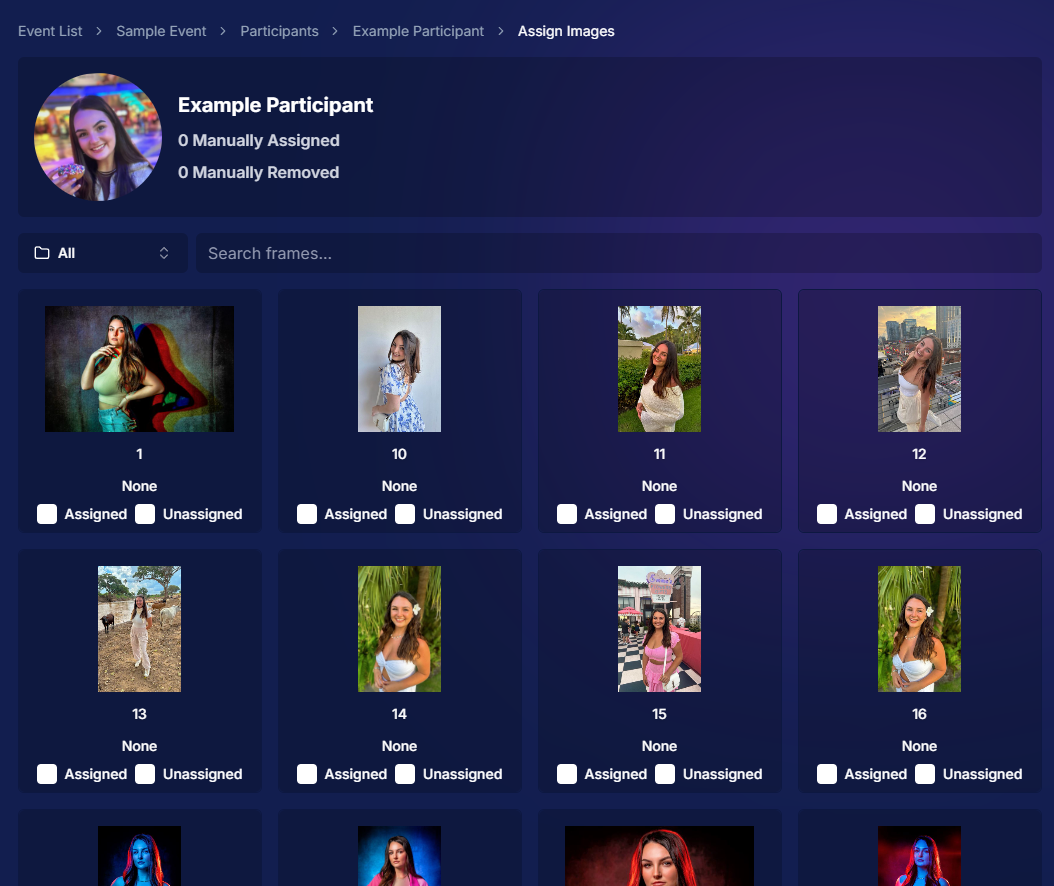
1. Manual Gallery Assignment & Participant Creation πŸ› οΈ

‍

We're thrilled to announce that manual gallery assignment and participant creation are now live! This means you can:

‍

  • β—‹ Assign images to someone's personal gallery manuallyβ€”perfect for those shots where the subject wasn't facing the camera, and face recognition didn't pick them up.
    ‍
  • β—‹ Create participants manually, either one at a time or by uploading a spreadsheet.
    ‍
  • β—‹ Instantly trigger marketing campaigns to individuals when you assign images to them, ensuring they receive their photos promptly.

‍

We believe this will greatly enhance your workflow and support needs. Let us know how it helps you during your next event!
‍

‍

2. Tweaks to the Retail Site for a Smoother Experience πŸ›οΈ

‍

We've made several improvements to our retail site to enhance the shopping experience for your clients:

‍

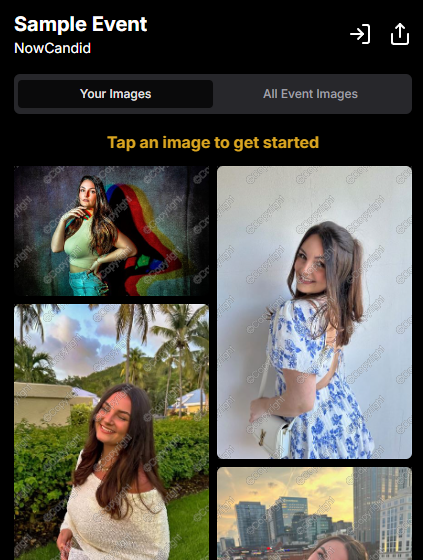
  • β—‹ "Tap image to get started" text now shimmers on the initial gallery screen to guide users who aren't sure what to do next.
    ‍
  • β—‹ Package creation improvements make it more intuitive for customers to customize their packages and select photos.
    ‍
  • β—‹ Product renders in the cart: The view cart screen now displays product images next to every item, including items within multi-item packages, for increased clarity.
    ‍
  • β—‹ Updated header and footer: Clear guidance on when to contact our retail support or reach out to you, the photographer, for assistance.

‍

These tweaks aim to make the purchasing process as seamless and enjoyable as possible for your clients!
‍

Theme:Β Liquorice - Watermarking:Β Default

‍

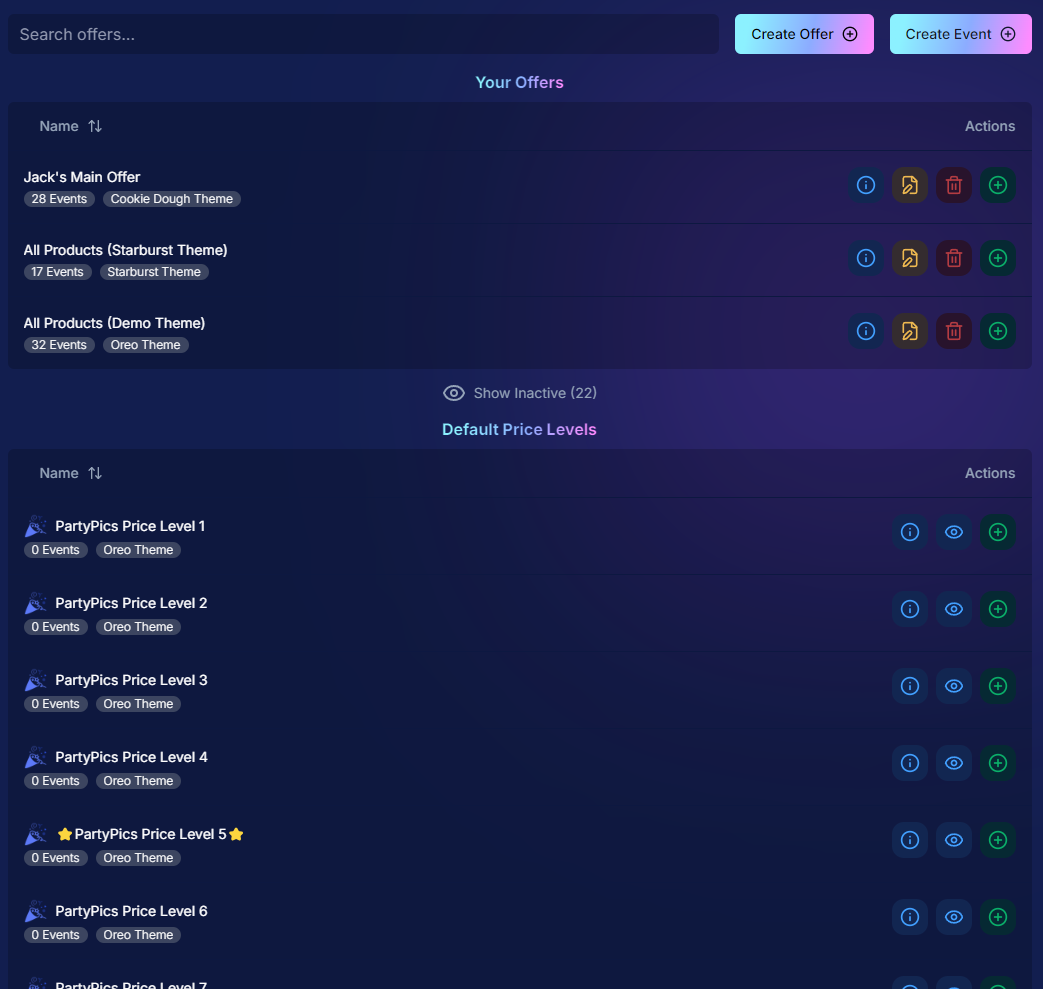
3. Default Price Levels Are Back! πŸ’°

‍

Great news! The Default Price Levels from our previous NowCandid system are back and better than ever.

‍

While you can still create custom offers, these ready-made Price Levels are optimized to help you maximize sales in various situations.

‍

  • β—‹ Optimized for success: Designed to boost your sales potential.
    ‍
  • β—‹ Versatile options: Suitable for a wide range of events and client needs.
    ‍
  • β—‹ Easy to access: Gives you good Offer options in a pinch or when entering a new market.

‍

For a detailed breakdown, click here.

‍

‍

4. New Image Notifications for Previous Purchasers πŸ›ŽοΈ

‍

We've improved our marketing system to better serve your clients and help keep those sales up:

‍

  • β—‹ If someone purchases on Day 1 and is photographed again on Day 2, they will now receive a notification about the new images added to their gallery.
    ‍
  • β—‹ Enhances customer engagement: Keeps clients informed and encourages additional purchases.
    ‍
  • β—‹ Prevents missed opportunities: Even early buyers stay in the loop for new content.

‍

This ensures your clients never miss out on their special moments!

‍

‍

5. Google Pay Added to Express Checkout Options πŸ’³

‍

We're excited to introduce Google Pay as a new express checkout option!

‍

Our available payment methods now include:

‍

  • β—‹ Traditional credit/debit card checkout
    ‍‍
  • β—‹ Apple Pay
    ‍
  • β—‹ Google Pay
    ‍
  • β—‹ PayPal (and PayPal Pay Later)
    ‍
  • β—‹ Venmo

‍

And guess what? We have one more express checkout option coming soon! Stay tuned. πŸ“’

‍

Theme:Β Liquorice - Watermarking:Β Default

‍

6. Capture App Version 4.4 for iOS & Windows πŸ“±πŸ’»

‍

The latest Capture App Version 4.4 is now available for both iOS and Windows, featuring:

‍

  • β—‹ Keyboard support for Windows: Windows laptop users can now input phone numbers using the keyboard when using the Tap-A-Face Workflow.
    ‍
  • β—‹ Performance improvements: Smoother and faster app experience.
    ‍
  • β—‹ sRGB color checking: The app now ensures images are in sRGB format, preventing issues caused by Adobe RGB images.
    ‍
  • β—‹ Event Selfie Check-In QR code display: Access the QR code directly from your device when needed.

‍

Upgrade now to enjoy these enhancements!

‍

‍

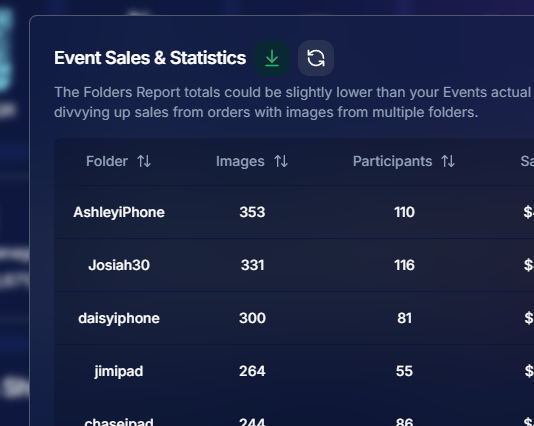
7. Enhanced Folders Report πŸ“Š

‍

Our Folders Report (which you can find using the Graph button on an Event's Management Page) just got more powerful:

‍

  • β—‹ Sortable columns: Organize by images, participants, sales, and more.
    ‍
  • β—‹ Real-time insights: Works live during events, allowing you to identify your best-performing photographers, mid-event.
    ‍
  • β—‹ Actionable data: Mid-event reporting helps you provide immediate feedback to your team to boost performance.
    ‍
  • β—‹ Download button: This report is now downloadable via the green button in the screenshot below as well!

‍

Optimize your event management like never before!
‍

‍

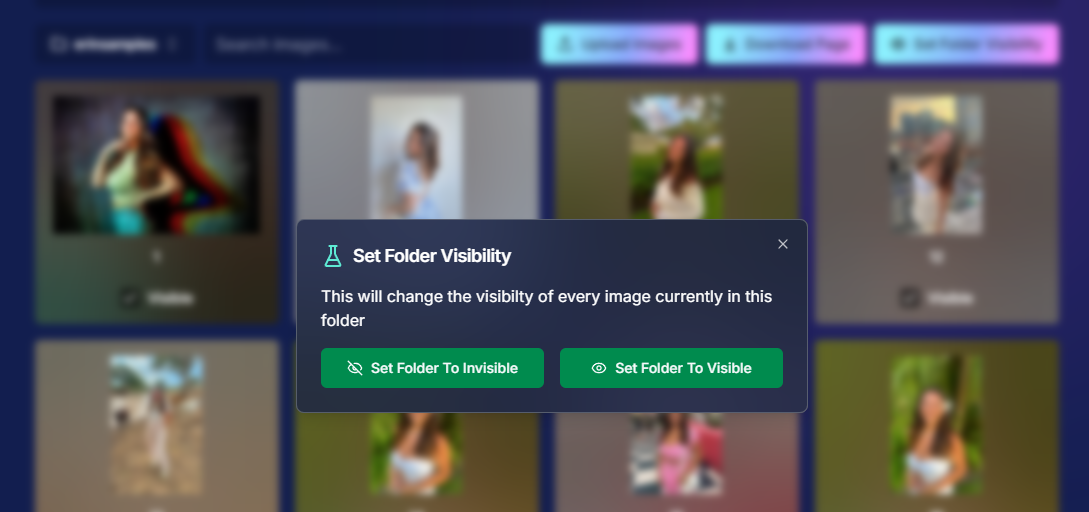
8. Bulk Visibility Control for Image Folders πŸ“

‍

We've added a handy button in the Manage Images page, when you have a folder selected:

‍

  • β—‹ Mark entire folders as visible or invisible with one click.
    ‍
  • β—‹ Use cases: Quickly hide a batch of images that need reworking, such as a blurry set.
    ‍
  • β—‹ Saves time: Streamlines the process of managing large numbers of images.

‍

Sometimes, mistakes happen! Now you can use this button to quickly hide images in bulk as you work to correct issues.
‍

‍

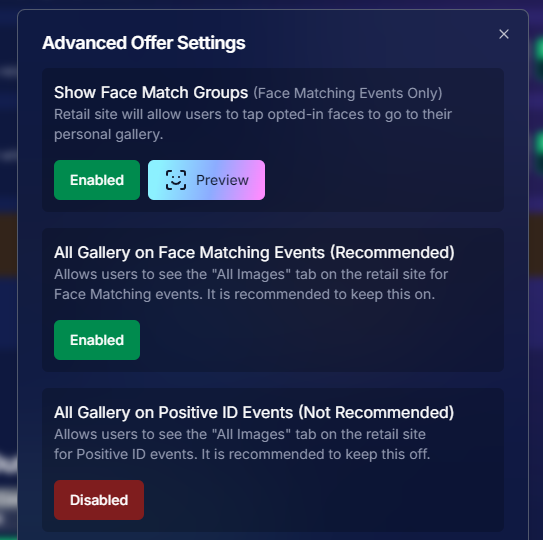
9. Customize "All Event Images" Gallery Settings πŸ–ΌοΈ

‍

You now have more control over the All Event Images gallery:

‍

  • β—‹ Override default settings at the Offer level.
    ‍
  • β—‹ Options:
    ‍
    • Turn off the All Event Images gallery for Face Matching Events.
      ‍
    • Turn on the All Event Images gallery for Positive ID Events.
      ‍
  • β—‹ Recommendation: We suggest sticking with the defaults, but if you'd like to explore the pros and cons, click here to schedule a chat with us!

‍

Tailor the gallery experience to suit any event's needs!
‍

‍

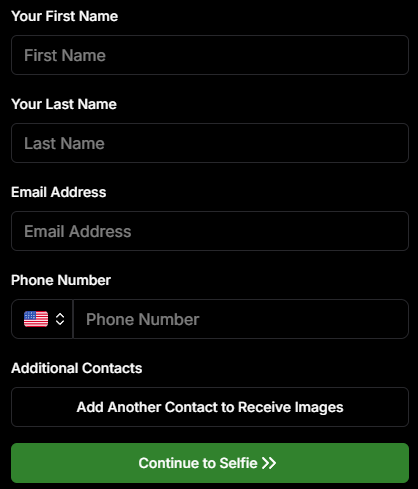
10. Simplified Selfie Check-In πŸ“²

‍

We've made the Selfie Check-In process even more user-friendly:

‍

  • β—‹ Only requires a cell number OR email address.
    ‍
  • β—‹ Encourages participation: Even though neither field says "optional," most people still provide both.
    ‍
  • β—‹ Addresses Fringe Issues: Every now and then, someone doesn't have (or refuses to provide) a cell or email address. This change will account for those individuals!

‍

Enhances guest engagement and reduces fringe support issues, with no changes on your part!
‍

Theme:Β Liquorice

‍

11. New Unsubscribe Keyword: "NOPE"! 🚫

‍

We've introduced a new, fun way for clients to manage their marketing preferences:

‍

  • "NOPE": Clients can reply with this word to opt out of marketing for a specific event.
    ‍
  • Future communications: They will still receive messages for future events unless they opt out again.
    ‍
  • Accidental "STOP" replies: If someone replies "STOP" though, they'll need to send "START" to our marketing number to resume receiving texts.

‍

This gives your clients more control while still keeping communication lines open for future events.

‍

‍

12. Seasonal Retail Themes: Apple Crumble & Candy Corn πŸ‚πŸŽƒ

‍

Get into the festive spirit with our new retail site themes:

‍

  • Apple Crumble:
    ‍
    • Autumn colors: Warm and inviting hues.
      ‍
    • Falling leaves: Adorable "leaves falling" animation upon gallery arrival, check-in completion, and after checkout.
      ‍
  • Candy Corn:
    ‍
    • Halloween vibes: Shades of black and bright orange.
      ‍
    • Candy corn confetti: Fun "candy corn toss" animation to celebrate the spooky season upon gallery arrival, check-in completion, and after checkout.
      ‍
    • Haunted Retail Site: A few ghosts frequently fly across your customer's screens as they shop!

‍

Delight your clients with these charming themes!

‍

Note: the Leaves &Β Candy Corn only fall across the screen upon gallery arrival, check-in completion, and after checkout - these GIFs are simply showing it in a loop :)

‍

Theme: Apple Crumble - Watermarking:Β Off

‍

Theme:Β Candy Corn - Watermarking:Β Off

‍

We hope these updates make your experience with NowCandid even more enjoyable and efficient.

‍

Your success is our top priority, and we're always here to support you. πŸ’–

‍

As always, if you have any questions or feedback, don't hesitate to reach out. We're all ears! πŸ‘‚

‍

Until next week, keep capturing those amazing moments!

‍

Cheers and sparkles,

‍

Candy 🍬

Related articles

Weekly Recap: Faster Payouts, New PhotoTag Details & Redesigned Marketing Emails πŸ’Έβœ¨
Feature Updates
September 18, 2026

Weekly Recap: Faster Payouts, New PhotoTag Details & Redesigned Marketing Emails πŸ’Έβœ¨

3
Β minutes read
Hey photo friends! πŸ‘‹

‍

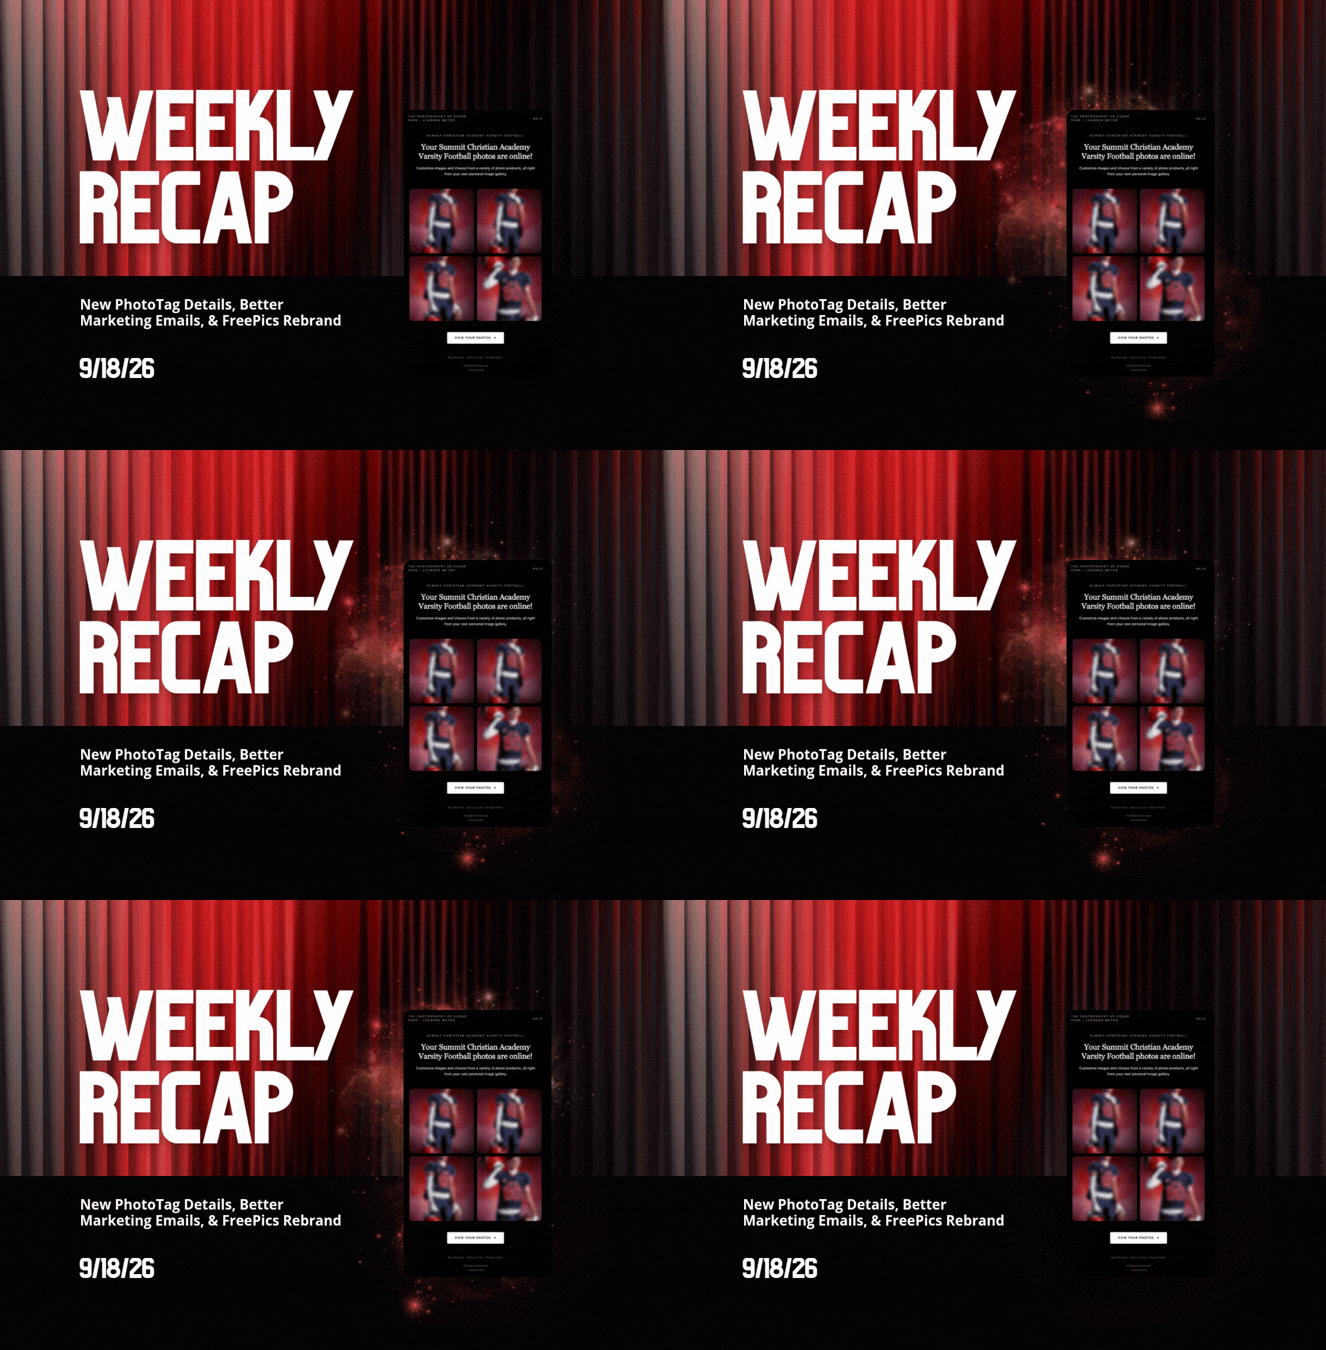
Candy here with another weekly recap! This week brings faster, more frequent payouts, a much more informative home for PhotoTags, redesigned marketing emails, and another round of Background Removal quality improvements.

‍

Let’s jump in!

‍

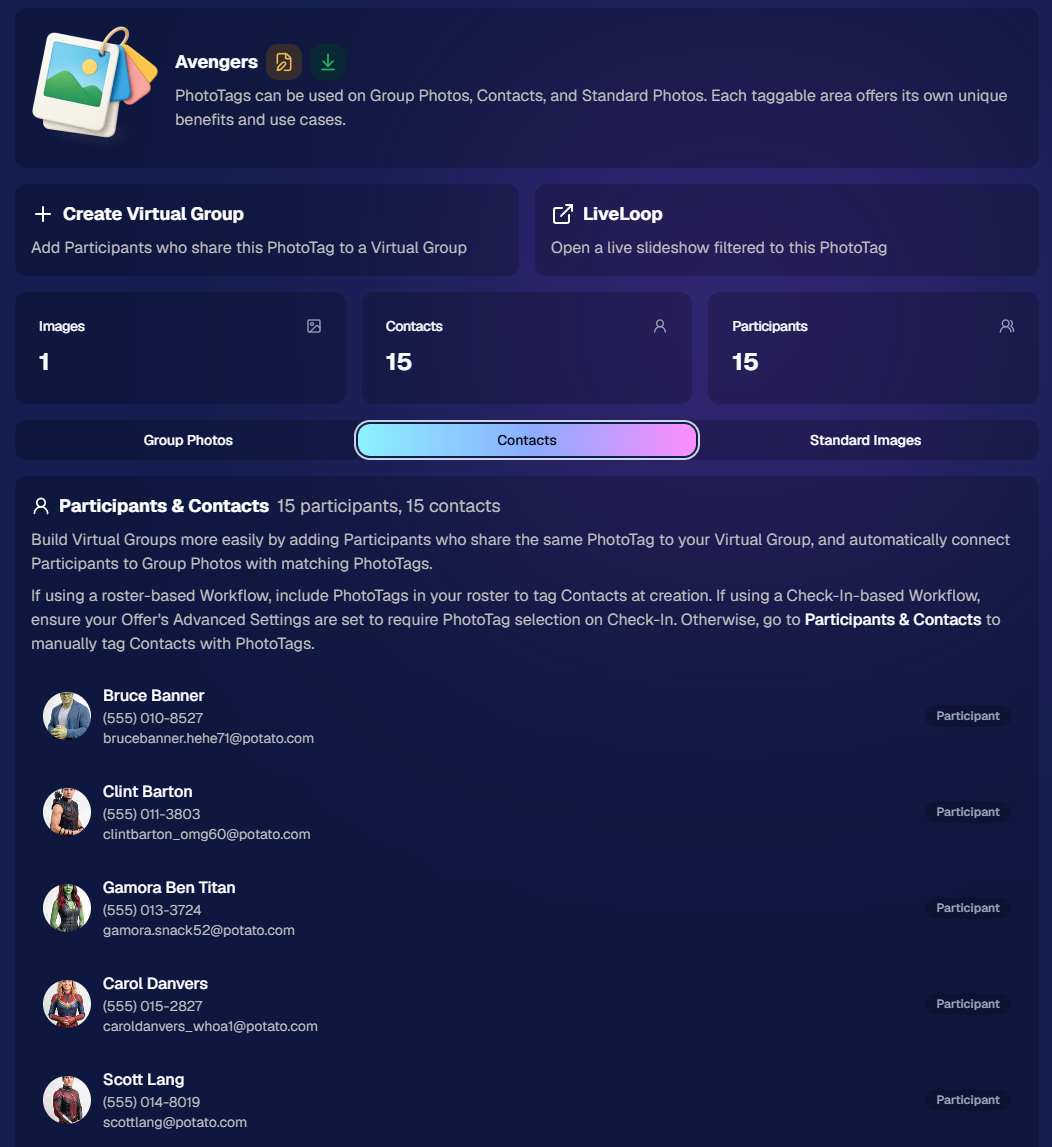
🏷️ NEW: PhotoTag Details Pages

‍

PhotoTags now have their own dedicated details pages.

‍

Click any PhotoTag from the PhotoTag List page to open a much more complete view of everything connected to it.

‍

From there, you can:

‍

  • ✏️ Edit the PhotoTag
    ‍
  • πŸ‘€ View tagged Participants and Contacts
    ‍
  • πŸ‘₯ View tagged Group Photos
    ‍
  • πŸ–ΌοΈ View tagged Standard Photos

‍

This is a pretty big improvement for anyone learning or managing PhotoTags!

‍

PhotoTags can affect several different parts of an Event, and these pages make those relationships much easier to see in one place. They should also be especially helpful when training employees or helping someone understand exactly how a PhotoTag is being used.

‍

‍

πŸ’Έ Faster, More Frequent Remittance Payments

‍

We’ve sped up our remittance schedule and are adding a second payment cycle each week, helping completed-order funds reach your bank account sooner.

‍

Previously, we sent your remittance statement on Wednesday, with the corresponding payment typically arriving in your bank account on Friday morning.

‍

Going forward:

‍

πŸ’° Orders completed Friday through Tuesday will be included on your Wednesday remittance statement, with payment typically arriving Thursday

‍

πŸ’° Orders completed Wednesday and Thursday will be included on a new Friday remittance statement, with payment typically arriving Monday

‍

That means the existing Wednesday payment cycle should now reach you about one day faster, while the new Friday cycle reduces the wait for orders completed later in the week.

‍

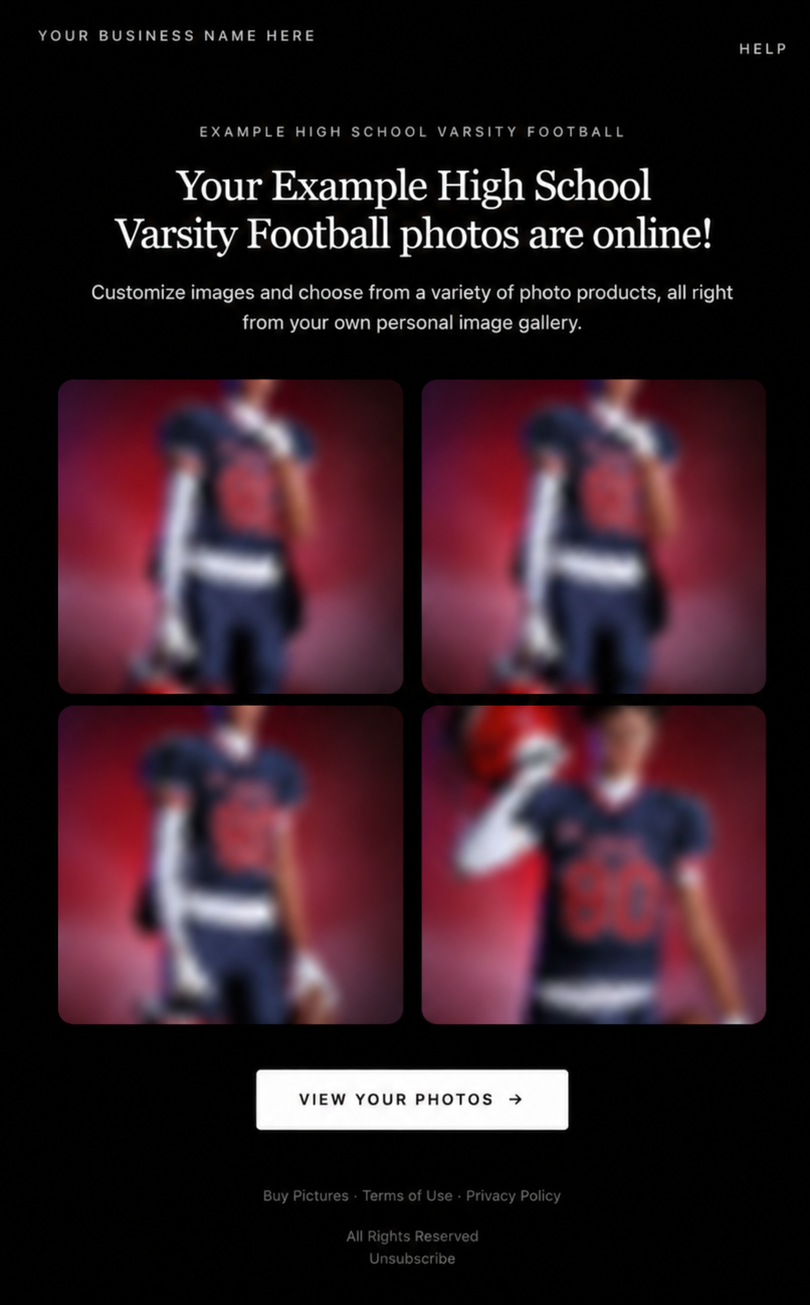
βœ‰οΈ Marketing Emails Get a New Look

‍

Marketing emails have been redesigned with a cleaner, more modern layout.

‍

There’s also a bigger change to the way images are protected:

‍

  • 🌫️ Email image previews are now blurred
    ‍
  • πŸ›‘οΈ This replaces the previous scrolling copyright treatment

‍

Blurring provides more consistent protection in situations where an email client might not properly render the scrolling copyright, or where the preview image is displayed outside an environment where GalleryGuard can protect it.

‍

Real email, but with business &Β event name replaced for privacy!

‍

Also: Minor Marketing Fix!

‍

We also fixed an edge case that could prevent a marketing campaign from starting when two different Participants shared only part of their contact information.

‍

For example, if two Participants had the same email address but different phone numbers, one Participant starting marketing should no longer incorrectly prevent the other from starting theirs.

‍

βœ‚οΈ Better Background Removal

‍

Background Removal got another quality pass this week:

‍

  • πŸ’‡ Improved hair cutouts
    ‍
  • ⚽ Better handling of certain sports portrait props, particularly soccer balls sitting on the ground

‍

These changes continue our work to improve cutout quality across the kinds of images photographers are actually shooting.

‍

πŸ†• "Quic" Is Now "Free"

‍

The Quic programs have been rebranded to Free.

‍

Nothing about the pricing or functionality has changed β€” just the names:

‍

  • QuicPics β†’ FreePics
    ‍
  • QuicPortraits β†’ FreePortraits
    ‍
  • QuicPics GO! β†’ FreePics GO!

‍

Same programs, same functionality, same pricing. Just a (hopefully) clearer name moving forward.

‍

πŸ›οΈ Retail Improvements

‍

✨ β€œDiamond Gloss” is now β€œGlossy Finish”

  • ‍We’ve renamed "Diamond Gloss" to Glossy Finish on the retail site to make the option clearer and easier for customers to understand.

‍

πŸ“± More reliable iOS sharing

  • The native iOS share sheet used by the press-and-hold download feature should now open more reliably.

‍

πŸ‘₯ Group Digital Downloads now behave like regular Digital Downloads

  • When no overlay is selected β€” or the Event doesn’t have one β€” Group Digital Downloads can now provide the full-resolution, uncropped original.
  • That means the image can be available immediately from the email receipt and avoids problematic cropping steps on Group Photos that aren’t a standard 2:3 aspect ratio.

‍

πŸ“¦ More accurate package previews

  • Fixed cases where Group and non-Group images could appear as previews for the wrong type of package product.

‍

πŸ–₯️ Dashboard Improvements

‍

πŸ“΄ New offline screen

  • If your device is completely offline, the Dashboard now tells you instead of leaving you wondering whether the site is simply loading slowly.

‍

πŸ“… Event Calendar color coding fixed

  • Events once again display the correct colors based on their Event Program.

‍

πŸ–ΌοΈ Better Virtual Group Foreground management

  • The Foreground Picker now shows the names of your saved foregrounds. Click one to preview it, and you can also rename foregrounds for easier reuse later.

‍

βœ‚οΈ Overwritten BGR images can reprocess

  • If you overwrite an image inside a folder marked for Background Removal, it can now be reprocessed as long as the replacement has the exact same dimensions as the original.
  • If the dimensions differ at all, the existing PNG will not be replaced.

‍

πŸ“‹ Roster upload error fix

  • Fixed an edge case where a malformed email containing a # instead of an @ could stop the roster upload process and leave only the rows before that error imported.

‍

πŸ‘€ Participant names on QR downloads

  • ‍QR download pages now display participant names in bold, making them easier to spot at a glance.

‍

πŸ“Š Clearer Sales & Shipping chart details

  • ‍Tooltips on the Event Details Sales & Shipping chart now break out Sales and Shipping separately on hover, adding some clarity.

‍

Capture App 5.10.1 (OTA)πŸ“±

‍

πŸ“±Selfie Check-In Station Mode fix

  • ‍The Continue button text has been shortened, and the Close button now stays accessible when PhotoTag Check-In is enabled.
  • Previously, the extra PhotoTag selection row could push the Close button off the bottom of the screen.

‍

That’s the week!

‍

The FreePics name change is the most visible update, but the new PhotoTag Details pages may be one of the most useful additions for teams working with PhotoTags regularly.

‍

Keep creating magic,

Candy 🍬

How to Make FreePics Work for Your Photography Business πŸ“Έβœ¨
NowCandid 101
September 14, 2026

How to Make FreePics Work for Your Photography Business πŸ“Έβœ¨

6
Β minutes read
In honor of our QuicPics Program’s rebrand to FreePics, we wanted to take a fresh look at some helpful info, best practices, and booking strategies for using FreePics and service photography successfully!

‍

Giving photos away for free might not sound like an obvious way to make money.

‍

But with the right setup, FreePics can be a powerful business tool β€” whether you’re getting paid by an event organizer, working with a sponsor, building the cost into ticket sales, developing relationships with venues, or simply using free photos to get your name in front of more potential customers.

‍

And depending on the kind of experience you want to offer, you now have three different Programs to choose from: FreePics, FreePics GO!, and FreePortraits.

‍

First: What Is FreePics?

‍

FreePics is designed for photographers who want to provide images to subjects at no cost to the person being photographed.

‍

Instead of relying on each participant to purchase their own images, the photography can be funded another way β€” or used as a marketing tool to help generate future business.

‍

That opens up a lot of possibilities.

‍

Ways to β€œSell” FreePics πŸ’Έ

‍

1. Work Through an Event Organizer

‍

One of the simplest approaches is to have the event organizer pay for photography as part of the event itself.

‍

That could include:

  • Reunions
  • Luncheons
  • Galas
  • Corporate parties
  • Balls
  • Private events
  • Community events

‍

Instead of charging individual guests for their photos, the organizer pays you for your time and coverage.

‍

This can make the photography feel like another included event amenity β€” just like entertainment, dΓ©cor, or catering.

‍

The original FreePics training material even suggested photographers may be able to charge a few hundred dollars per hour, per photographer, depending on the event and market.

‍

2. Find an Event Sponsor

‍

Another option is to have a sponsor cover the photography.

‍

In exchange, you can incorporate the sponsor’s branding into the experience, including branded image artwork or overlays.

‍

That gives the sponsor something more memorable than a banner or table sign: photos attendees may actually save, share, and revisit.

‍

Sponsorship pricing will naturally depend on the event, audience, and sponsor, but this type of arrangement may support a much higher overall photography budget than selling directly to individual attendees.

‍

3. Build Photography Into Ticket Sales 🎟️

‍

If every attendee is going to receive photos, another option is to simply include the photography cost in the ticket price.

‍

A relatively small increase per ticket can add up quickly across a large event.

‍

For example, an organizer could add a photography fee to each admission ticket, then use that revenue to pay for event coverage while letting every guest access their photos afterward.

‍

Participants feel like they’re getting something included with admission, while the photographer still gets paid.

‍

4. Partner With Party Planners or Venues 🀝

‍

FreePics can also be a great tool for building recurring relationships.

‍

A photographer can establish themselves as the go-to photographer for a planner or venue and create an arrangement that works for everyone involved.

‍

That could mean a commission, referral agreement, preferred-vendor relationship, or another setup that encourages the planner or venue to continue sending events your way.

‍

Instead of thinking about a single event, you’re using FreePics to help build a steady pipeline of future bookings.

‍

5. Use FreePics as Marketing for Your Own Business πŸ“£

‍

You don’t necessarily have to make money directly from every FreePics Event.

‍

Sometimes, the value is the exposure.

‍

Offering free photography at the right event can introduce your business to dozens or even hundreds of potential customers.

‍

Because participants receive their images directly, you have an opportunity to put your business and branding in front of them while creating a positive interaction with your photography.

‍

That can turn one promotional event into future:

  • Event bookings
  • Portrait sessions
  • School or sports opportunities
  • Corporate work
  • Referrals
  • Repeat customers

‍

Sometimes the free photo is the product.

‍

Sometimes it’s the advertisement. πŸ‘€

‍

Which Free Program Should You Use?

‍

This is where the three Programs start to differ.

‍

FreePics β€” Best for Most Events ⭐

‍

For most photographers, FreePics is the best all-around option.

‍

It provides the full FreePics experience and gives you the most flexibility in how images are delivered to participants.

‍

If you simply want to photograph an event and make it easy for subjects to receive their images for free, start here.

‍

It costs more per image than the other Free Programs, but you’re paying for the broader experience and flexibility.

‍

Best for:

  • Parties
  • Galas
  • Corporate events
  • Reunions
  • Sponsored events
  • General event photography
  • Most situations where you want free image delivery

‍

FreePics GO! β€” Best for a Gallery-First Experience πŸ–ΌοΈ

‍

FreePics GO! is a gallery-only experience, which allows it to cost less per image than standard FreePics.

‍

But the gallery format also gives it some unique advantages.

‍

FreePics GO! is especially useful if you want participants to clearly see that they can download different versions of their images β€” such as versions without overlay artwork.

‍

It can also be a better choice when using Background Removal, because participants can browse different background options before deciding which version of an image they want to download.

‍

And because subjects are already browsing through a gallery, FreePics GO! gives you a stronger opportunity to showcase physical products and other potential upsells alongside their free images.

‍

Best for:

  • No-overlay option is important
  • Sponsored events with branded artwork
  • Background Removal workflows
  • Events where you want subjects choosing between different image treatments
  • Photographers who want to promote prints or physical products
  • Situations where keeping per-image costs lower is important

‍

FreePortraits β€” Best for Headshots πŸ‘€

‍

FreePortraits takes the FreePics concept and adapts it specifically for headshot-style photography.

‍

Because the workflow is more limited β€” with only one image file sent out per image β€” it can be offered at a lower per-image cost than standard FreePics.

‍

If your Event is centered around individual portraits rather than a larger event gallery, that limitation can actually make perfect sense.

‍

Best for:

  • Corporate headshots
  • Conferences
  • Professional networking events
  • Employee portraits
  • Profile photos
  • Other single-image portrait workflows

‍

If you want the FreePics experience but you’re really photographing headshots, FreePortraits is likely the better fit.

‍

A Simple Way to Choose 🍬

‍

When in doubt:

‍

Use FreePics for the best general-purpose experience.

‍

Choose FreePics GO! when the gallery itself adds value β€” especially for Background Removal choices and physical-product upsells.

‍

Choose FreePortraits when you’re photographing headshots and only need to deliver one finished image file per image.

‍

The goal with all three is the same: make it easy to get great images into your subjects’ hands while giving you flexibility in how the photography fits into your business.

‍

Free Doesn’t Have to Mean Unprofitable πŸš€

‍

FreePics is less about giving your work away and more about deciding who is paying for the experience β€” and what value the photography creates.

‍

Maybe the event organizer pays you.

‍

Maybe a sponsor does.

‍

Maybe the cost is included in admission.

‍

Maybe a venue relationship brings you more bookings.

‍

Or maybe the Event itself acts as marketing that introduces your photography business to a whole new group of people.

‍

There are plenty of ways to make free photos make business sense.

‍

And with FreePics, FreePics GO!, and FreePortraits, you can choose the version that fits the Event instead of forcing every job into the same workflow. πŸ“Έβœ¨

‍

Cheers,

β€” Candy 🍬

QuicPics Is Becoming FreePics! πŸ“Έβœ¨ Here’s What’s Changing:
FreePics
September 14, 2026

QuicPics Is Becoming FreePics! πŸ“Έβœ¨ Here’s What’s Changing:

3
Β minutes read
You may notice some familiar names looking a little different around our platform.

‍

That’s because we’re making a few big naming changes! 🍬

‍

QuicPics is now FreePics.

‍
QuicPics GO! is now FreePics GO!

‍
QuicPortraits is now FreePortraits.

‍

Don’t worry β€” the Programs you know aren’t going anywhere! This update is all about making our platform easier to understand, especially for photographers who are just getting started. πŸ™Œ

‍

Note:Β And if you did not know - the "GO!" stands for "Gallery Only!" since that Program delivers free images via one URL and not directly texting your Participant every image like standard FreePics.

‍

Why FreePics? πŸ’‘

‍

As our platform has grown, so have the number of Programs, tools, and Workflows available when creating and managing Events.

‍

That’s a great problem to have, but it also means the names we use need to do a better job of helping photographers understand what each option actually does.

‍

FreePics gets right to the point. πŸ“·

‍

The FreePics Program allows photographers to provide images to participants for free, while FreePics GO! brings that same idea to our pay-as-you-go image delivery workflow. FreePortraits follows suit, giving the portrait-focused Program a name that fits naturally alongside them.

‍

For longtime users, it may take a little getting used to. But for someone creating their first Event and deciding which Program is right for them, we think these names make those choices much clearer.

‍

Clarity is something we’re continually working to improve across our platform, and sometimes that means revisiting things that have been around for a long time. ✨

‍

And speaking of things that have been around for a long time…

‍

So, What Happens to the QuicPics Name? πŸ‘€

‍

We’re not saying goodbye to QuicPics.

‍

Quite the opposite.

‍

We’re freeing it up. πŸš€

‍

The QuicPics name has a lot of history within Candid Color Systems, Inc. and with our founder, Jack Counts Jr.

‍

Long before the software, tools, and photography platform we have today, QuicPics was part of the story that eventually grew into PartyPics, Candid Color Systems, and even Glamour Shots.

‍

Jack’s photography story began more than five decades ago photographing college parties and building a business around getting those photos back to customers quickly. That early operation grew into PartyPics and ultimately helped launch Candid Color Systems in 1972.

‍

Over the decades, the company continued building around many of those same ideas that started it all: speed, innovation, and finding better ways to get photos into customers’ hands. βš‘πŸ“Έ

‍

That same entrepreneurial spirit eventually helped lead to ventures like Glamour Shots, which became one of the most recognizable photography brands of its era.

‍

So, when we started thinking about where we’re headed next, QuicPics felt like a name worth bringing back to center stage.

‍

And no, we're isn’t spilling all the beans just yet. 🍬🀐

‍

But freeing up the QuicPics name gives us room for something exciting coming soon. πŸ‘€βœ¨

‍

Pardon Our Dust! πŸ› οΈ

‍

This is a pretty sweeping change.

‍

We’re updating QuicPics to FreePics, QuicPics GO! to FreePics GO!, and QuicPortraits to FreePortraits throughout our platform, documentation, resources, and more.

‍

With that many places to update, there’s always a chance we missed a spot. πŸ˜…

‍

If you run into something that still says QuicPics when it should say FreePics β€” or if anything seems off or isn’t working quite right following the change β€” please let us know!

‍

We apologize for any short-term confusion while everything gets switched over, and we appreciate your patience as we make the transition. πŸ’œ

‍

FreePics is here, and QuicPics isn’t gone. It’s just getting ready for its next chapter. πŸš€

‍

Cheers,

β€” Candy 🍬

Let’s get in touch

If you’re a photographer looking to add NowCandidβ„’ services to your wheelhouse, set up a call with us!

How to customize formatting for each rich text

How to customize formatting for each rich text

How to customize formatting for each rich text

How to customize formatting for each rich text

How to customize formatting for each rich text

‍

‍

What’s a Rich Text element?

The rich text element allows you to create and format headings, paragraphs, blockquotes, images, and video all in one place instead of having to add and format them individually. Just double-click and easily create content.

A rich text element can be used with static or dynamic content. For static content, just drop it into any page and begin editing. For dynamic content, add a rich text field to any collection and then connect a rich text element to that field in the settings panel. Voila!

Headings, paragraphs, blockquotes, figures, images, and figure captions can all be styled after a class is added to the rich text element using the "When inside of" nested selector system.

  • List One
  • List Two
  • List Three
  • List Four
  • List Five

This is a link

This is bold text

‍

  • ‍

‍